
TOP 10 Next Generation Firewalls
Palo Alto
After Spending Many Years in Cisco Security ASA and Worked with microsoft TMG the Company Decided to go to New technology
After Reading About it I realized that Gartner agree that Palo Alto Consider to be the leader when it comes to Next Generation Firewall appliances
So let me guide you with the First Step of Initial Setup and Configure it to Internet Access for users
Well first Let start Login to the ESXI host

Then Choose to Deploy the OVA File

Browse to my Folder were i Save the OVA
Press Next

Type a Name of your Choice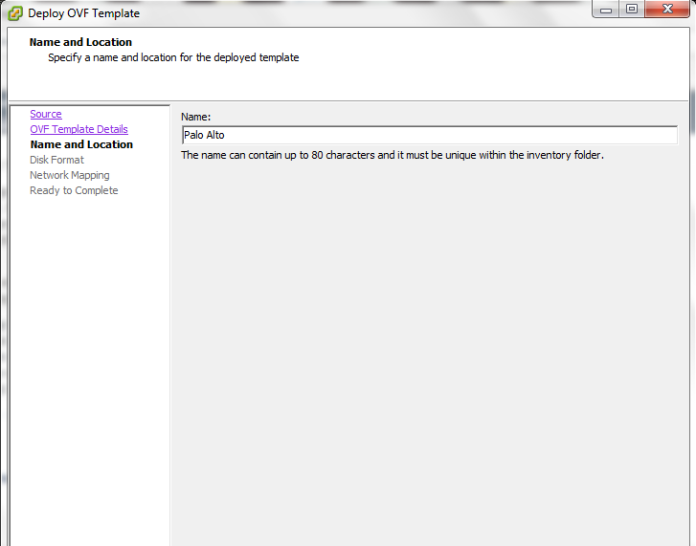
I Prefer to Select Thin Provision is i will not Reserve the Whole Size
Select the Network
Now Press Finish
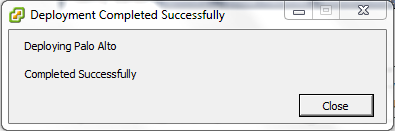
The Deploying Procedure Start Now we Finished with The Installation of the OVA
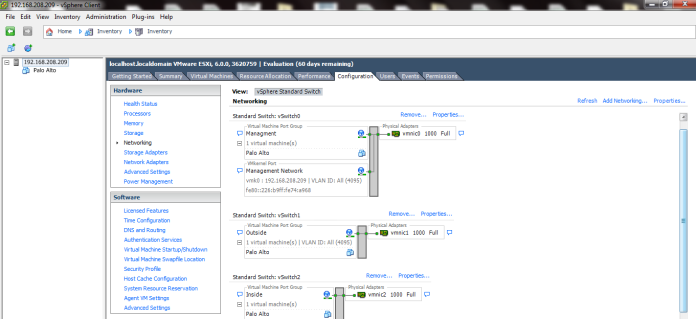
Depend on your Scenario and how many Network Card you Need
in my Scenario i Need 4 (Management, WAN, LAN and DMZ)
in my ESXI i have this Already Configured as you see in the Picture
Now i will Edit My Virtual Machine
Configure the Network Adapter 2 to be my Outside

Click Add and Select my Third Network Card for LAN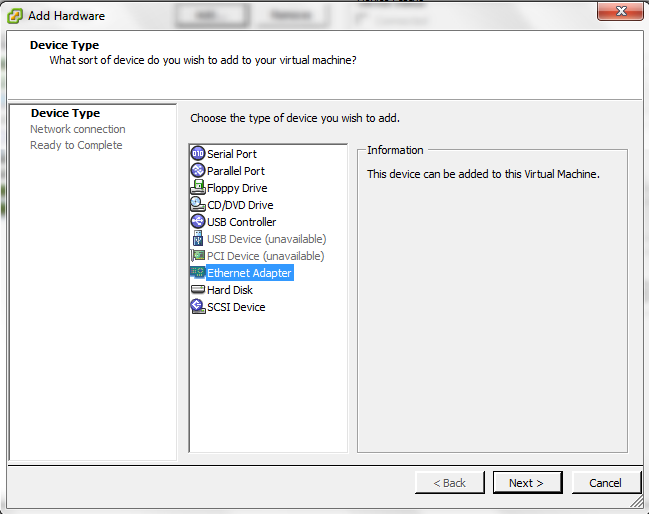
Choose the Network Label (Inside) Which Represent the LAN Also DO the Same for Server Side which Represent by (DMZ)
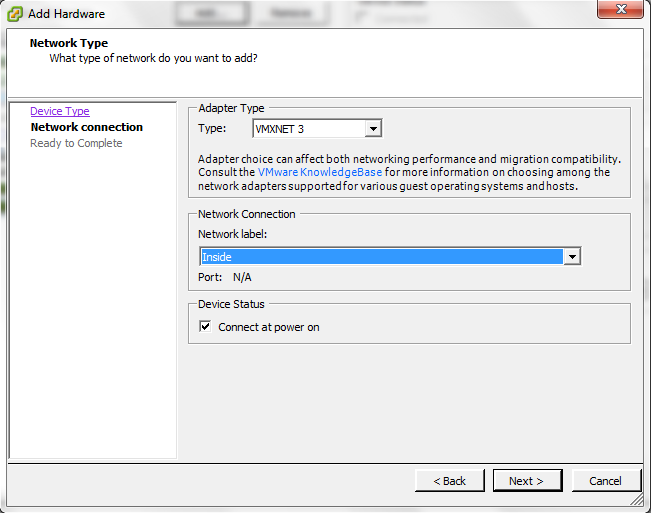
Press Finish and Its Created

Now Start the Machine
Username: admin
Password:admin
and Set your IP Address for the Machine
Now Set the Default Gateway and Save it (Commit)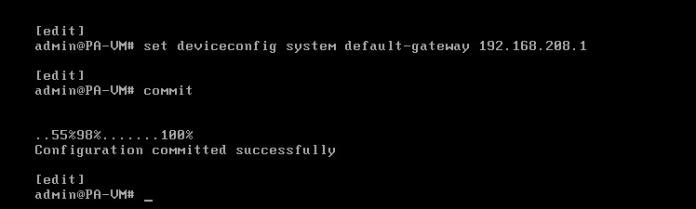
You can check your Management IP configuration by issuing the command
show interface management
Now Go to the Web Page Https://192.168.208.222
Enter the Default username and Password
normal Warning Regard the Default username and Password
Go to the Device – Setup – Management – Management Interface Settings and you Can Edit the Service or IP Address
Second Go to Device – Setup – Service – Services and Configure the DNS and NTP

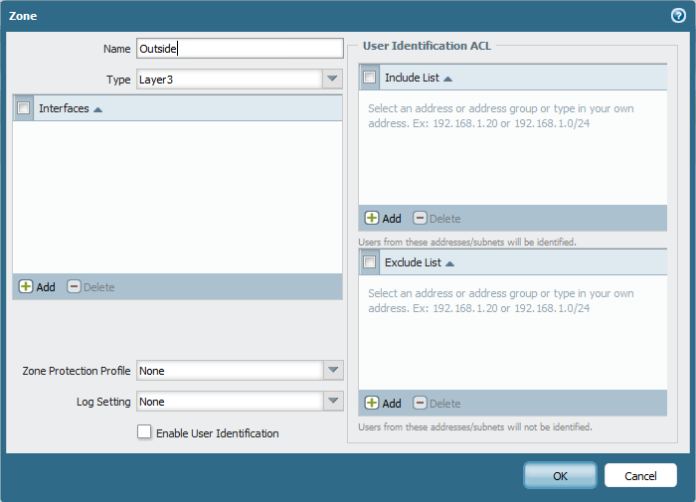
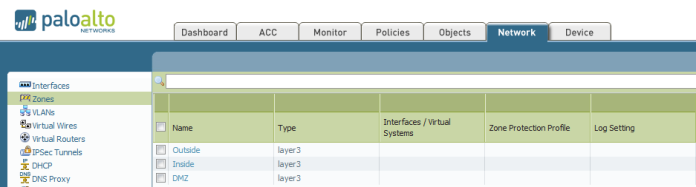
Second Go to Network – Zones and Add the Zones (Outside, Inside and DMZ) Repeat the Same Step Below to Create Each
Now Go to Network – Virtual Router and Create New One and Name it
Second Go to Network – Interfaces – Edit Each interface (Ethernet 1/1, 1/2 and 1/3)
Outside, inside and DMZ
Type of Layer 3
Select the virtual Router and Security Zone
then Go to IPv4 tab and Add the IP Address
Second go to Advanced Tab – Other info – Management profile and press new 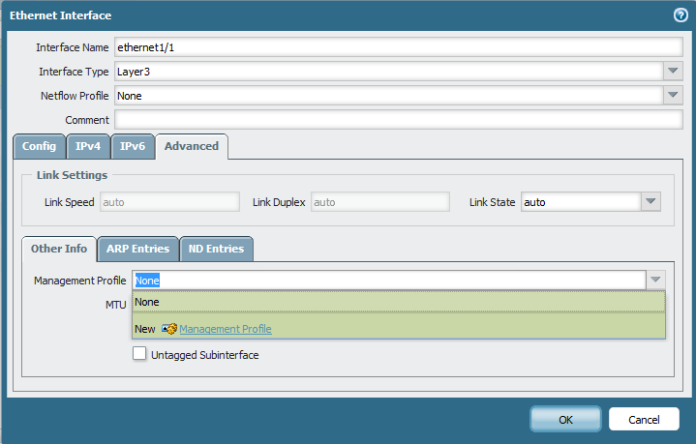
Select Name and Edit the Service Permitted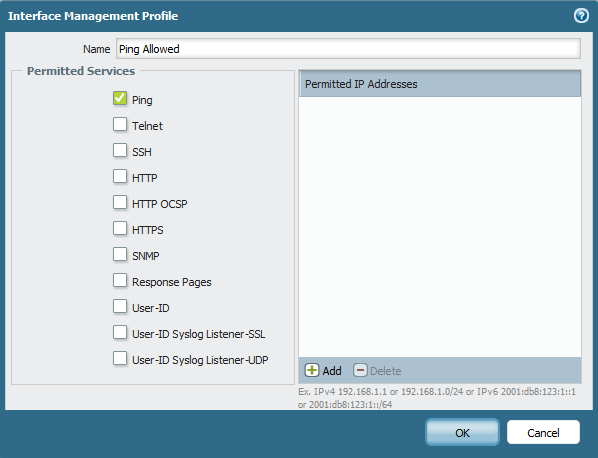
And Then Select the Management profile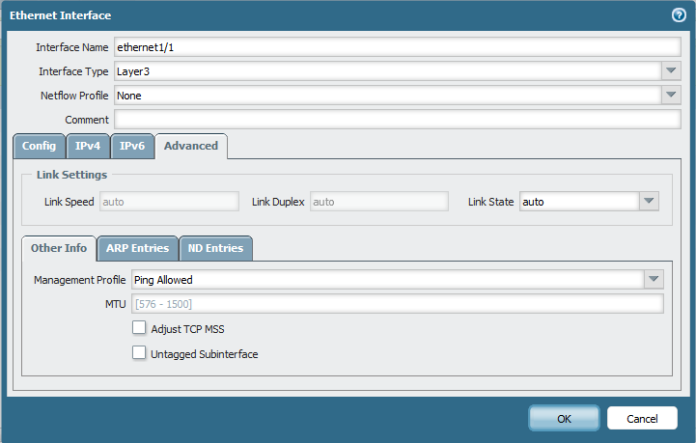
Repeat the Same Step to Each Interface (LAN and DMZ)
here the Zone is Different for inside
and Add the LAN IP Address : 192.168.250.250


Now Go back to Virtual Router and Add a Static Routes to Default Route to your internet ISP Router in my Case : 37.76.249.91
Now time to Configure your Security Rule
Go to Policies – Security and Add one
Name : Allow-Net
Type: Interzone
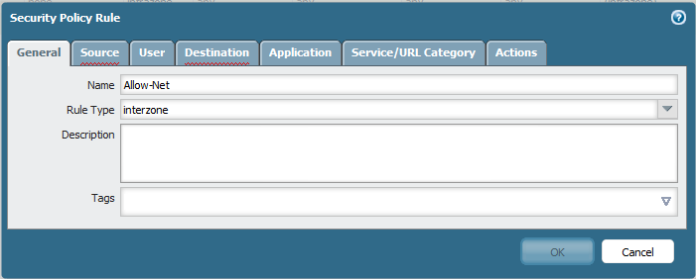
Choose the Source to be Inside
Choose the Destination: Outside
Select the Service/ URL category : Any
Select the Action : Allow
Log Setting Enable Log at Session Start and END

Now Go to to Configure the PAT (Port Address Translation)
Policies – NAT add new
Choose Name

Choose your Security Zone:Inside
Destination Zone: outside
Destination interface: Ethernet 1/1 (My WAN Network)

Then Select the Translated Packet and Configure it As below
Dynamic IP and Port for PAT


Now i go to my Client and I too IP from DHCP
Test the PING and Now the ping is working perfectly to IP Address 8.8.8.8
and i Test the Web browsing and It’s Working Perfectly
;D
Note. you can see the session in Palo Alto cmd
show session all
or
show session id

Hi there, i have being working with PAN for last few years and cannot agree on your comment about PAN being a leader when it comes to NGFW by Gartner. Anyhow, good article you have here. Regards,
LikeLiked by 1 person
First Thanks very much for your Comment
But you Can Check on the Gartner Page for 2016
https://www.gartner.com/doc/reprints?id=1-3805JH8&ct=160525&st=sb
LikeLike
Pingback: Configure Palo Alto to allow inside DMZ (FTP server) | Root
Hi Root,
I find your blog very useful. Keep up the good job!
LikeLike
Thanks for your word
LikeLike
Pingback: Plao Alto LDAP Integration | Root
Pingback: Palo Alto High Availability | Root
Pingback: Palo Alto Site-to-Site VPN | Root