Uncategorized

Implementing SIP Gateways in CUCM

I been Requested to make a blog about SIP Implementation by a Big Company in Saudi Arabia which make me proud just to post this here so let me start by explaining ;D

To place external calls, Cisco Unified Communications Network (CUCM) deployment needs a connection the Public Switched Telephone Network (PSTN). Gateways can be integrated in CUCM by using different protocols such as Media Gateway Control Protocol (MGCP), H.323 or Session Initiation Protocol (SIP) for signaling on VOIP call legs.
In an Earlier Blog i show you how to Configure the CUCM and make Calls through an H.323 Gateway which an earlier technology https://ccieroot.com/2014/11/08/cisco-unified-communications-manager-cucm-initial-setup/

In this blog i will show you how to configure a SIP Gateway in CUCM and in the IOS so First Make Sure you have all your Information about the Numbering Range and the SIP Server with you so no Delay could happen in configuring your Site
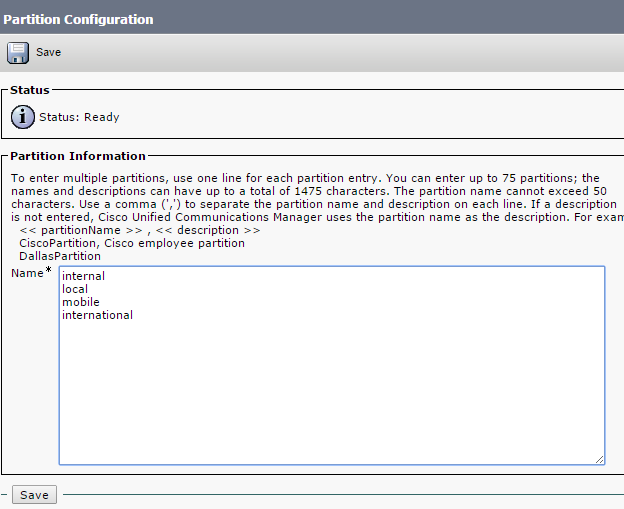
in our example our Numbering Range is 2217910 to 2217919
and the SIP Server is  10.208.9.69
My Gateway IP is 172.29.7.94

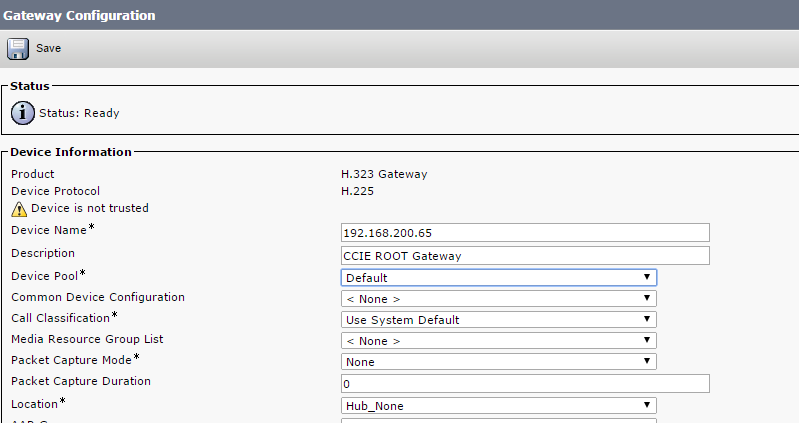
in the CUCM go to Device – Trunk – Add New SIP Trunk and Device Protocol as SIP and None for Trunk Service Type
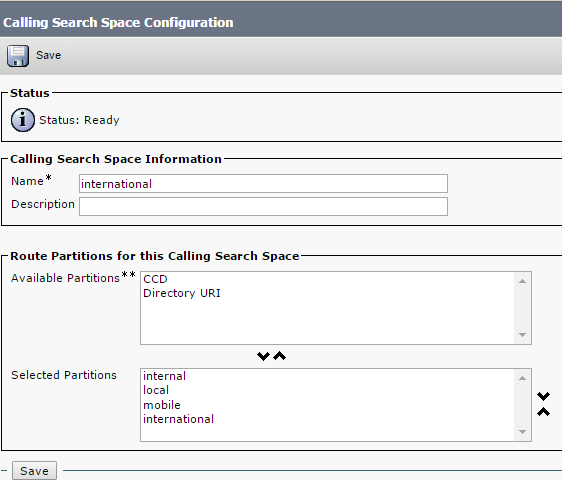
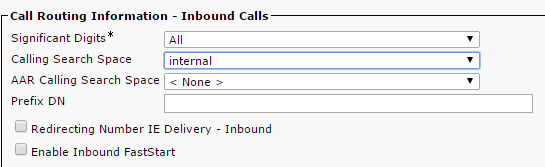
Name the Device anything you want and choose the correct Device Pool, Location and configure your Calling Search Space for inbound Call Then go down Type the Address of your Gateway n the Field of Destination Address in our case 192.168.200.86, Chose your SIP Trunk Security Profile and SIP Profile

Screenshot 2014-11-08 17.58.45


Screenshot 2014-11-08 17.58.49


Screenshot 2014-11-08 17.58.53


Now Configure the Dial Peer for the SIP in the CUCM
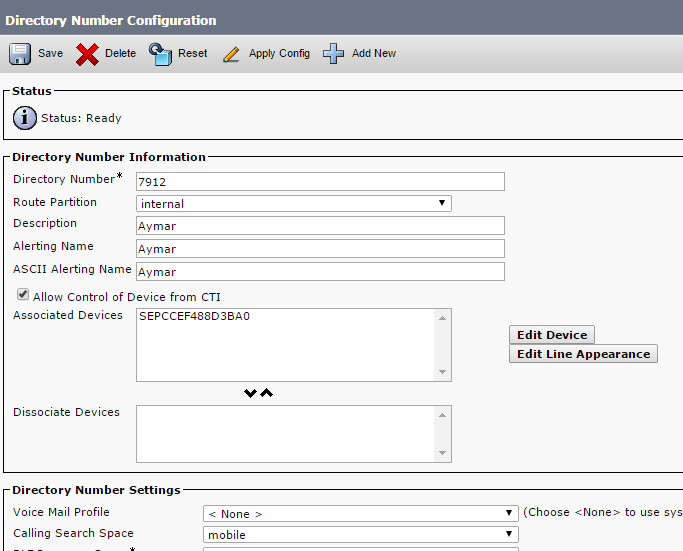
something you should make sure from is when you make a call to outside number that your the calling number which is your ID number is the 221791X not only 791X  cause then it will drop your call
so you have two option weather you make a translation rule or prefix the 221 in the dial-peer
in our example we prefix it in the dial peer
so Go to Call Routing – Route/Hunt – Route Pattern – Add New
we will configure a route pattern to a mobile Number so you choose the Route Pattern which is 9.05XXXXXXXX, Choose the Route Partition and the Gateway/Route List. Afcors click the Provide Outside Dial Tone and change the Call Classification to Offnet
and here is the extra thing that differ this from H.323 configuration which is the
Calling Party Transformations we add  to Prefix Digits (Outgoing Calls) 221

1


Now Let’s Configure the IOS

First let me configure my Interfaces

interface GigabitEthernet0/0
Description “Lan Connection”
ip address 192.168.200.86 255.255.255.0
duplex auto
speed auto
!
interface GigabitEthernet0/1
ip address 172.29.7.94 255.255.255.252
duplex auto
speed auto

Then Enable the route to the SIP Server

ip route 10.208.9.0 255.255.255.0 172.29.7.93

Now lets enable the voice service and allow it to communicate with different protocol

voice service voip
allow-connections h323 to h323
allow-connections h323 to sip
allow-connections sip to h323
allow-connections sip to sip
sip
early-offer forced

“early-offer forced” it allows SIP Gateway to route calls in a Delayed Offer to Early Offer scenario. Almost all of the providers require Early Offer SIP calls. It is actually recommended to send Early Offer from CUCM in order to avoid early media cut-through issues.

Now Configure the Translation rule for outgoing call
voice translation-rule 1
rule 1 /^9\(\)/ /\1/

Added to a translation Profile
voice translation-profile OUT
translate called 1

and then added to a dial-peer
dial-peer voice 700 voip
description ** SIP TO STC **
translation-profile outgoing OUT
destination-pattern 9T
session protocol sipv2
session target ipv4:10.208.9.69:5060
session transport udp
voice-class sip dtmf-relay force rtp-nte
dtmf-relay sip-notify rtp-nte sip-kpml
codec g711alaw

the Command
voice-class sip dtmf-relay force rtp-nte
dtmf-relay sip-notify rtp-nte sip-kpml
is optional you could have enouhg by using
dtmf-relay rtp-nte sip-notify
but i use it all for worse cases

and Since our Phone Extension is 4 digit only we need to make a translation rule that strip the Number from the 221 for incoming call

voice translation-rule 2
rule 1 /^2217/ /7/
rule 2 /^0122217/ /7/

and added to a translation profile
voice translation-profile SIP-IN
translate called 2

and then configure an Incoming Dial-peer
dial-peer voice 701 voip
translation-profile incoming SIP-IN
destination-pattern 791.
session protocol sipv2
session target ipv4:192.168.200.10
incoming called-number 012221791.$
dtmf-relay sip-notify rtp-nte sip-kpml
codec g711alaw

Also the Command
incoming called-number 012221791.$
is optional now you can use
incoming called-number .
or nothing at all the call will use the destination-pattern to reach the phone but i use it for worse cases

Now you can try to make a call and it will go through


Standard
Uncategorized

Cisco Unified Communications Manager (CUCM) Make It Work

I have created a blog before about the installation of the CUCM https://ccieroot.com/2014/10/24/installation-of-cucm-8-6/ but after that you need to complete couple of steps to make your cucm run like a charm and all of your phone able to call Each Other in the network so lets start

the first step which is optional is to change the server name to an IP Address in case you dnt have a DNS and change the timing of the Server

Go to System – Server – press Find and change the name to an IP

Screenshot 2014-11-08 16.28.23


Screenshot 2014-11-08 16.28.35


Go to System – Date/Time Group and then Save and Reset

Screenshot 2014-11-08 16.45.10


Second thing is the region which is configure by default, you can create a new one but in our case we will leave it as its
From System – Region Information – Region
Screenshot 2014-11-08 16.29.08


Third step is the Location which also configure by default which we will use
Go to System – Location info – Location
Screenshot 2014-11-08 16.30.19


Now the Biggest thing is the Device Pool which hold all this information together
Go to System – Device Pool and there is one configured by Default and configured with the CUCM Group and Region and the Timing you just need to add the Location to it
Screenshot 2014-11-08 16.46.51


Now go to Call Routing – Class Of Control – Partition – Add New

since this blog only about the initial Step after Installation of CUCM i will not explain the partition and CSS but i will show you how to configure it
Screenshot 2014-11-08 16.31.45


Save it and now Go to Call Routing – Class Of Control – Calling Search Space and configure the partition under each CSS that belong to
for Ex. Internal CSS only have internal partition which mean he can call people under internal Partition
Local CSS can call Internall Partition and also Local Partition…etc

Screenshot 2014-11-08 16.32.13


Screenshot 2014-11-08 16.32.21


Screenshot 2014-11-08 16.32.29


Screenshot 2014-11-08 16.32.37


Now we Configure the phones go to Device – Phone – Add New

Choose the Model of the phone and the protocol
in our case cisco ip phohne 8941 and protocol SCCP
Insert the MAC Address, choose Device Pool, Phone Button Template, Softkey Template,Location and for Owner Option Make it Anonymous and last select the Device Security Profile
1


2


Save and then go to the Left Side to add the Extension go to Line1 Press on it
Choose the Extension you want, in our case we put 7912 and we put it under partition Internal then i give name for the Alerting Name and ASCII Alerting Name and choose a Calling Search Space which we make it a mobile which mean he can call people in internal, local and mobile partition.
and then i configure the name in the field of Display (Caller ID), ASCII Display (Caller ID), Line Text Label and ASCII Line Text Label
1


2


Now Configure all your phone the same way with Different Directory Number and Like That all your employee can call each other and like that your CUCM is Ready
The next step is to configure the Gateway and Weather it was H.323 or SIP so you can be able to make an outside call, in our example we will configure an H.323
Go to Device – Gateway – Add New – Choose H.323 Gateway and Press Next it will take you to the page of the Gateway and you need to configure most important is the Device Name which is the IP Address of the Gateway, Device Pool, Location and configure Calling Search Space for Inbound Call when it come to your Port in our Case “Internal”. After you save you have to Reset so the Gateway Will Register to the CUCM

1


2


Now We Configure a Route Pattern so Go to Call Routing – Route/Hunt – Route Pattern – Add New
we will configure a route pattern to a mobile Number so you choose the Route Pattern which is 9.05XXXXXXXX, Choose the Route Partition and the Gateway/Route List. Afcors click the Provide Outside Dial Tone and change the Call Classification to Offnet

1


OMG this is the Longest Blog i ever write but don’t worry
Now this the Last thing to DO is to configure the IOS Gateway
First enable the voice service and allow it to communicate with different protocol

voice service voip
allow-connections h323 to h323
allow-connections h323 to sip
allow-connections sip to h323
allow-connections sip to sip

Then Go Under Each Port and Trunk all of them Under one Trunk Group and also configure that when ever a call come it will go to a specific directory number for example the Reception or the Attendant System … for this example i choose the Reception DN which is 7912

voice-port 0/2/0
trunk-group AYSAR
connection plar opx 7912
!
voice-port 0/2/1
trunk-group AYSAR
connection plar opx 7912

Now Configure the outpound Dial Peer

dial-peer voice 1 pots
trunkgroup AYSAR
description “Mobile Call”
destination-pattern 905……..
forward-digits 10

or

dial-peer voice 1 pots
trunkgroup AYSAR
description “Call Anywhere”
destination-pattern 9T
“This Call the Lazy 9 instead of Configure a dial peer for different Route Pattern (Local, Mobile, international) we just have this one dial peer for all”

and configure an Inbound Dial Peer for incoming Call

dial-peer voice 3000 voip
destination-pattern 791.
session target ipv4:192.168.200.10
dtmf-relay cisco-rtp rtp-nte h245-alphanumeric
codec g711alaw
no vad

Now Try to make a call and it will work and call your company and your phone will work
test it in your environment or lab and if you have any Doubt or didn’t work just ask me

The END

Standard