6.5

VMware vSphere Auto Deploy (ImageBuilder)

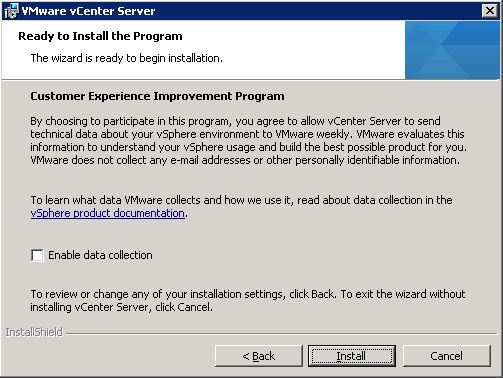
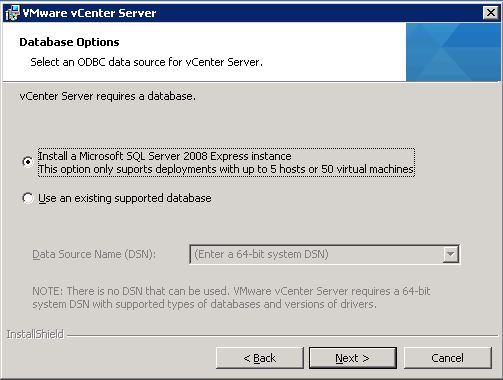
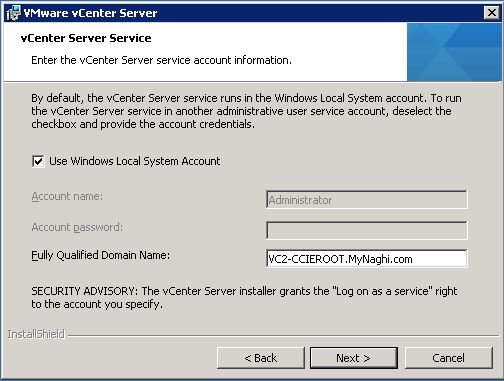
1 Host is simple installation
but
what if i have 100 host  :O
i cant just go one by one to do it if it’s not a smart move so

Auto Deploy is the solution, The architecture of auto deploy has changed in vSphere 6.5, one of the main difference is the ImageBuilder build in vCenter, you can create image profiles through the GUI instead of Power CLI

one of the main requirement is to make sure of DHCP scope Configuration:

  • Option 066 – with the Boot Server Host Name (in Cisco it will be different command)
  • Option 067 – with the Bootfile Name

My Design :
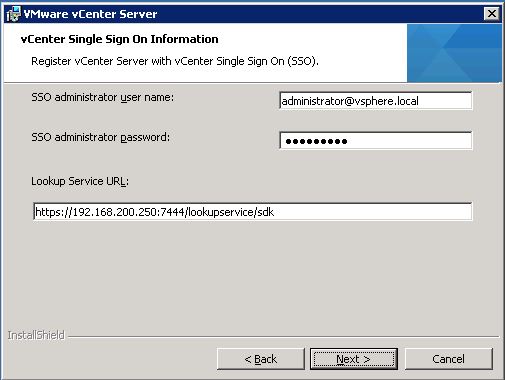
vCenter Server : (192.168.200.251)
TFTP Server : (192.168.200.102)

Lets start
Go to Administration > System Configuration
2
Then Choose Services4
Click on Auto Deploy > Actions >Edit the Start Type
5
its Manual by default so change it to Automatic
6
Then Click Start7
Then Move to ImageBuilder Service and do the Same step8
Now log out of the Web Client and Login Again
you will see in the home Page the Icon of (Auto Deploy)
12.JPG
in the in the right Pane click on (Auto Deploy)
13
Then go to Software Depots > Import Software Depost14
I already downloaded a Depots from VMware Web Site
13A
Then i choose to import the Downloaded Depots
15
Once it finish Click Close
16
then when you highlight the Depots it show everything you have inside the File17A
Now go to Deploy Rules > Create A Deploy Rule
30
Choose  a name and i made it simple i Select All hosts. you can define it by MAC or Range of IP Address31
Select the Image Profile 32
Choose the host profile i created in the earlier blog33
Choose where you want the Host to be in which cluster34
Review and click Finish35
As you can see the rule is in (inactive) Status we will activate it after complete our other configuration in DHCP Side36
I will download my TFTP Files from my vCenter
Go to vCenter – Configure – Auto Deploy and click on Download TFTP BOOT Zip
0
And Extract it the ZIP File to my TFTP Folder60
Then i Turn my TFTP
i use Tftpd64 it so easy to use
61
Now go back to the vCenter – Configure – Auto Deploy and this time Copy the BIOS DHCP File Name i will need it in Cisco DHCP Configuration
0
and as you see
Option 66 is the Command (Next-server) Which direct to IP of my TFTP Server
Option 67 is the BIOS DHCP File Name
1000
Now Lets go back to the vCenter and Activate our Rule
highlight the rule and click on Activate
0C
The rule will go up Then press Next 0D
Now Click on Finish 0F
Now lets start our Machine100
you can see configuration is loading
101
it will take couple of minute1000
and as you can see it start loading the VMware ESXi
300
and as you see it Applying the host Profile700
and Done and it took an IP of (192.168.250.13)
so now i press F2 to login
1001
Username : root
Password: still not set so you just press Enter
101010
now click on Configure Password905
and put the new password and press Enter
906
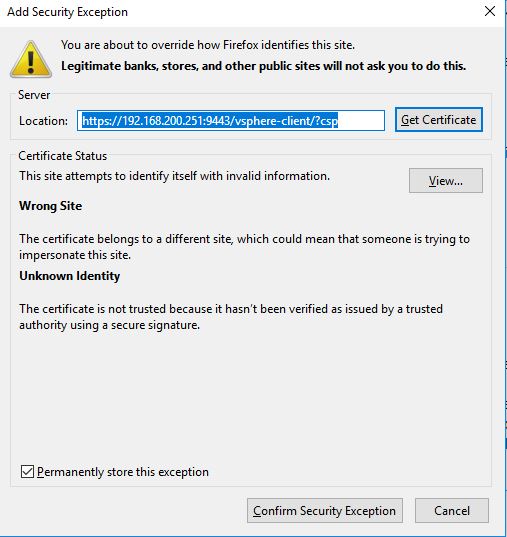
Now browse to (192.168.250.13) and click on Advanced and made an Exception 1002
Confirm the Exception
1003
put the Username and Password i configure earlier
1004
and finally you can see the host now running HPE customized image 6.5 that we download from VMware
1005
and in vCenter page i see it added to my Cluster
100A.JPG

;D

Standard
6.0

VMware vMotion Cross vCenter 6.0

This is one of the most amazing feature introduced in vSphere 6.0 that allows virtual machines (VMs) to switch from one vCenter Server instance to another

Traditional VMware vMotion is the feature to allow users to move virtual machine to another host managed by the same vCenter, but Cross vSwitch vMotion basically allows you to migrate virtual machines between different vSwitches. Not just from vSS to vSS but also from vSS to vDS and vDS to vDS.

Note:
that vDS to vSS is not supported. This is because when migrating from vDS metadata of the VM is transferred as well and the vSwitch does not have this logic and cannot handle the metadata.

so in the previous blog we did ELM (Enhanced Linked Mode) which is requirement for vMotion Cross vCenter and that mean (Shared SSO domains) and another requirement is Enterprise Plus license. Both vCenter Server instances must be time-synchronized and last thing For migration of compute resources only, both vCenter Server instances must be connected to the shared virtual machine storage.

Note: in case you didnt match the VM requirement you can use app such as (Vinchin Backup & Recovery)

there is a network port requirement but i connected both machine in my lab to the same network so no need for them but you can check them in the VMware website
Screenshot 2023-12-27 114416

so Lets start
Go to vCenter Home page > Host and Clusters1
Expand vCenter > Cluster > Host > manage > Networking > VMKernel adapter > select the network card
2
Enable the port properties > select vMotion traffic
i used the same interface as the management traffic since i don’t have many network card
3
Repeat the same steps in the other vCenter

Migration Steps
Now i will move my VM from host (192.168.208.210) to (192.168.208.209)
Expand the cluster > expand the host > right-click the VM you would like to migrate4
Select Change both computer resource and storage > Select Compute resource first5
Now select the destination host (192.168.208.209)6
Now select the storage7
Then i will select the Datacenter-VC18
and finally i will select the Network Adapter9
Note:
that the IP Address of the VM that you are migrating will not magically change, so you will need to make sure both the source and the destination Port-group belong to the same layer 2 network.

Next thing select to the schedule the vMotion10
and last thing click finish11
now as you can see it move the VM12
and Done finally 😀14

Note:

  • this feature for instance Datacenter Migrations or when you are moving VMs between clusters for instance or are migrating to a new vCenter instance even and You can even do it without having a shared datastore between the source and destination vCenter
  • Advanced Cross vCenter vMotion, introduced in vSphere 7.0 U1c, is only supported between vSphere (vCenter and ESXi) versions 6.5 or greater. The source vCenter must run vCenter 7.0 U1c or later.
Standard
6.0, VMware

VMware 6.0 Configuring vCenter Server ELM (Enhanced Linked Mode)

Hello Again

I show you in earlier blog how to configure Linked mode for VMware 5.5  As a result of these architectural changes, Platform Services Controllers can be linked together. Previously, vCenter Linked Mode was only available for Windows vCenters.

Until the release of vSphere 6.0, the new vCenter Enhanced Linked Mode (ELM) can connect multiple vCenter Servers (both vCenter Servers running on Windows and vCenter Server Appliances) by using one or more Platform Services Controllers.
vSphere 6.0, Platform Services Controller (PSC) was introduced as Embedded PSC for single vCenter Server and External PSC to manage multiple vCenter Servers.

the limitations for Linked Mode with external or embedded PSCs are different:

  • For vCenter Servers deployments with external PSCs, you can join up to 10 external PSCs and 15 vCenter Server systems in a single SSO domain.
  • For vCenter Servers with an embedded PSC, you can join up 15 nodes in one SSO domain.

You can also migrate virtual machines across clusters on separate vCenter instances

so let’s go
This is my Single Sign-on Machine

2
i will run the VMware CD3
Click Install vCenter Server for Windows4
Click YES
5
Press Next
6
Check the box
I Accept the term of the license agreement7
I choose (Platform Service Controller)8
i put the Machine FQDN9
then i click OK
10
put the domain name, vCenter admin and password and default site name as this is a new SSO11
Leave the port to it default
12
Press Next
13
again Next
14
now click Install
15
it will take couple of minute
16
Press Finish
17
you can go to Program and software and you will fins the software installed on the machine
(platform Service Controller)
18

Now lets go to my First vCenter (VC1-CCIEROOT) 19
Lets start the installation same way20
Click Next
21
Accept the agreement and Click Next22
this time choose Deployment type as (vCenter Server)
1
Specify the SSO Server FQDN name or IP Address and the SSO Administrator credentials (administrator@vsphere.local ) which will be the same system running your vCenter SSO service (192.168.200.250)2
Make sure that all vCenter Servers in a Linked Mode group are registered to the same vCenter Single Sign On server.

Click OK to accept the SSO Certificate
3
choose to use the Windows Local Account and Click Next4
Again Accept the default value and Click Next5
and again accept the default value for ports and Click Next6
Click Next 😀

7
and Finally Install
8
And Finish
11
you can see the software (vCenter Server with an External PSC)30
Repeat the same Steps with VC2-CCIEROOT

Now to check your configuration go and browse to any of vCenter IP Address
60
Accept the Certificate
61
Login using the Administrator account62
in the dashboard go to Hosts and Clusters26
you can see in the right side both vCenter27
Once selected the vCenter you can see the detail of it under the Manage > Settings > General28
and the same for the second vCenter29

Note:

  • A single vCenter can manage 300 ESXi host with 3000 virtual machines, while using linked mode can manage 1000 ESXi hosts with 10000 virtual machines. 
  • You can create a vCenter Enhanced Linked Mode group only during the deployment of vCenter Server Appliance or installation of vCenter Server. You cannot create a vCenter Enhanced Linked Mode group after you install vCenter Server or after you deploy the vCenter Server Appliance.
  • from vSphere 6.5 U2 and vSphere 6.7 onwards, External PSC has been deprecated, Embedded PSC is recommended to manage multiple vCenter Servers and deploy VCSA with embedded PSCs will be used now and onward.

That is a Win ;D

Standard
5.5, VMware

VMware 5.5 Configuring vCenter Server Linked Mode (Single Console Multiple vCenter)

Now who wouldn’t love to manage his VMware Infrastructure using a single management console. And you can do this with VMware vCenter Linked Mode. it’s available since vSphere 5.1 but im doing it here in 5.5 but let me warn you, there is a degradation in your scalability which i will not Discuss but you always need to check this feature is supported for how many vCenter and how many Hosts
1
i took this picture from kendrickcoleman which explain my design for this scenario and to to tell you the truth i learn alot from this site, even CBTNuggets didnt mention the way to configure vCenter in Linked mode in their Nugget so i had to test alot and here is the way
one of the most important requirement of Linked Mode is that both vCenter Server is Registering to the Same Single Sign-on Server which force me to change my LAB.

My LAB:
Single Sign-on Server (SSO): 192.168.200.250
vCenter 1 (VC1-CCIEROOT): 192.168.200.251
vCenter 2 (VC1-CCIEROOT): 192.168.200.252

I configured my  DNS resolution (forward / reverse working) on all my Windows servers.

Now similar to my second blog where i install vCenetr i will follow the same procedure.1
I will choose Custom Install > vCenter Single Sign-On > Install2
Click Next
3
Check the Box to Accept the License Agreement
4
Check the Box to add the AD as my identity source
5
Choose the standalone vCenter Single Sign-On Server
6
Choose a password
7
Use the default Site name
8
Click Next for the default port
9
Click Next
10
Choose Install
11
it will take couple of minute to finish the installation
12
Click Finish
13
and here i finish the first part on the first server14

Now we move to the first vCenter (VC1-CCIEROOT) to configure the features
But this time we will Choose vSphere Web Client1
Click OK
2
Click Next
3
Accept the License Agreement
4
Click Next
5
Click Next to accept the default port
6
Now the Most Important step is to define the SSO Server
Choose a password
7
and before you press next also put the IP Address of the SSO Server8
Click Yes to accept the SSL SHA fingerprint
9
Click Install Certificates
10
Click Install
11
Click Next and it will proceed with the installation
12
Click Finish
13
and this is a message to let you know the installation is finish successfully
14
Second step install the vCenter Inventory Service > Install15
Click OK
16
Click Next
17
Accept the License Agreement
18
Click Next to accept the location of the installation
19
Enter the FQDN for the first vCenter
(VC1-CCIEROOT.mynaghi.com)
20
Click Next
21
Select the Small and click Next
22
Also again here you enter the SSO Credential and the IP Address of the SSO Server
23
Select Yes
24
Click Install to start the installation
25
it will take time to finish
26
Click Finish
30
Last but not least Select the vCenter Server > Install31
Click OK
32
Click Next
33
Accept the Agreement
34
no need to input any license since this is a LAB just click Next and it will install the evaluation License35
Choose to install the Database
36
Check the box to use the Administrator Account since i’m login with the Domain Admin Credential37
Create a standalone vCenter
38
Click Next to Accept the Default Ports
39
Choose the Small Size
40
and again Enter the Credential of the SSO Server
41
Click Yes
42
Click Next
43
make sure the name is the correct one
44
Click Next
45
Click Install
46
it will take couple of minute
47
and the database will take more time too48
once the SQL is finish the Server will progress with the vCenter Installation
50
Click Finish
51
and as you can see all my servers are installed52

Now we will repeat the same step in the second vCenter (VC2-CCIEROOT) for both feature Web Client and Inventory but for vCenter Server there is a little change so i will show it to you here
so select vCenter Server > Install 1
Click OK
2
Click Next
3
Accept the Agreement
4
Click Next on the License
5
Select to install the SQL Database
6
Also use the Local Admin here
7
Now this is the most important Step
Choose to join a VMware vCenter Server group using Linked Mode
8
Click OK
9
ENter the DNS FQDN for the first vCenter
(VC1-CCIEROOT.mynaghi.com)
and click Next
10
Click Next
11
Select Small Size Deployment
12
Enter the Credential of the SSO Server
13
Click Yes to Accept the SSL SHA1 fingerprint
14
Click Next
15
Enter the FQDN of the Server
(VC2-CCIEROOT.mynaghi.com)
16
Click Next
17
Click Install
18
Give it time
19
and more time20
and more more time 😀21
and just more more more time
i promise this is the last time
22
and Finish
23
now let’s browse to the vCenter page
vCenter 1 (VC1-CCIEROOT): 192.168.200.251
Click Advanced to accept the Certificate24
Confirm it
25
and now i will login to the vCenter page26
and as the page of vCenter show up click on vCenter27
and as you can see it show two vCenter in my page
VC1-CCIEROOT.mynaghi.com & VC2-CCIEROOT.mynaghi.com 28
As Easy As It Get  😀

Standard
VMware

VMware High Availability

(OMG we lost everything)

i don’t think there is any manager in this world want to hear this
losing all the VM and you have to wait for hours to restore your backup
so the solution is high availability
from this picture below there is VM Registered to each hosts (BTW the picture is borrowed from another web :D)
host1
Once the host fail the VM will move to the other Hosts
host2
so let’s deploy this and test it
GO to Home > Host and Clusters1
Select Datacenter > CCIEROOT Cluster > Manage > Settings > vSphere HA choose Edit2
Check the box (Turn ON vShere HA) and then you choose from the Menu in the right3
Select Host Monitoring > VM Monitoring Status > Choose Option (VM Monitoring Only)4
Select Datastore heartbeating > choose to Automatically Select Datastore accessible from the host
5
Under vSphere DRS > select Fully Automated
6
Now go to Datacenter > CCIEROOT Cluster > Monitor > vSphere HA > click on Summary
7
Then select the Related Object > Virtual Machines and you can see each VM reside under which host
8
i will need to install VMware tools under all machines
9
Click Mount
10
then double click on the DVD Drive (D:)
11
Choose Yes12
Complete the Installation13
Select Next
14
Choose Typical
15
Click Install
16
The installation will take less than 1 Minute
17
Click Finish
18
and click yes to restart the machine and repeat this on all your machines
19
now the Machine is up 20
now for testing let’s shutdown our host (192.168.208.209) which VM (windows 10-B) reside on21
Just click OK
22
and you can see the shutdown initiated
23
As you can see the machine windows10-B is disconnected
24
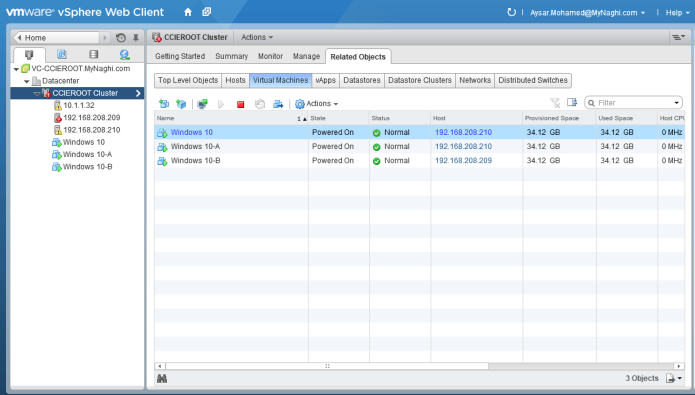
3 minute and the machine moved to the new host (192.168.208.210)33.PNG
and just like that we establish High Availability 😀

Standard