
Okay
I saw many post from people complain about self-provisioning they cant get it to work or they hear IVR keeps saying “This device could not be associated with your account…”I decide to make my own and try the service my self
The Self-Provisioning feature been introduced in CUCM version 10 it allows an end user to plug a new phone out of the box into the network and follow a few prompts to identify the user and Walla it’s working with minimal administrative effort.
It’s been released to make the lives of the administrators easier. So Smile ;D
Lets start
go to User Management – User/Phone Add – Universal line Template – Add New
Name the Template
and choose to fill the line Description and Alerting Name as you wish i did first name and last name plus my description Also the Route Partition and CSS

Also you have option to fill the Call forwarding if you want

Second go to User Management – User/Phone Add – Universal Device Template – Add New
Fill the Name and Device Description as you Wish and Choose Device pool and Security Profile and Also the SIP Profile and Phone button template just to make sure your phone get all the detail instead of going back and Edit

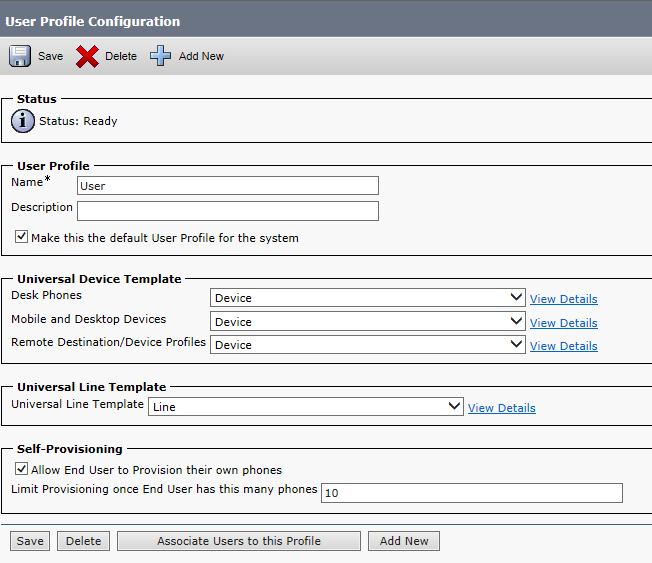
go to User Management – User Settings – User Profile – Add New
Name it and from Drop Down Select the Device Template you create fir your Desk Phone and Mobile and Remote if you have and Also Choose the Line Template and Make Sure to Check the Box to Allow End User to Provision Their Own Phones
Now time for LDAP Configuration i Already Blog before about it Earlier Here
so Go to System – LDAP – LDAP System and Check the box and Choose your LDAP Sevrer Type

First make Sure to Edit the user in Active Directory to have their Extension in the IP Phone Filed
Then Go to System – LDAP – LDAP Directory and click Add New
now this is CUCM 10 and you can see there is New Field so
after filling the Required Data go to Access Control Group and add Standard CCM End Users
and Check the Box to Apply Mask to Synced Telephone Number to Create A new line for inserted user and Mask of XXXX
if this Box not checked your end User will not have a Self -Service user ID or Primary Extension which Both Required to Provision a Phone
After Save Press the Button: Perform Full Sync Now


Now go to User Management – End User and Check it Auto take the Self-Service user ID and Primary Extension


Now go to Device – CTI Route Point – Add New
Giv it a Name, Device Pool and a Location Then Save 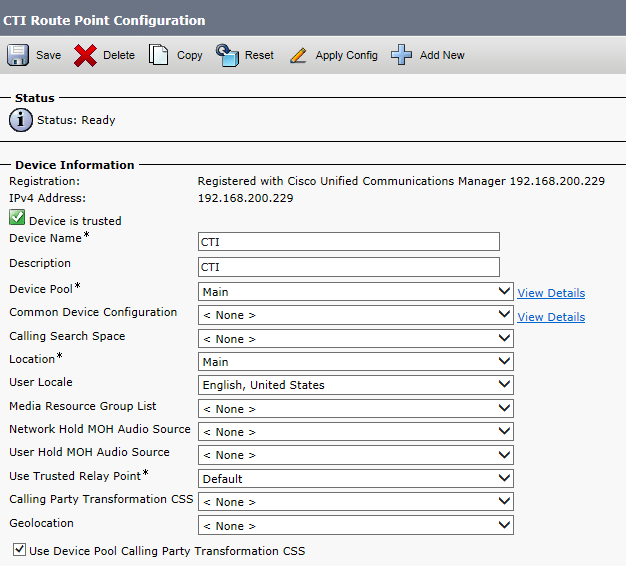
Now Add the Directory Number Which will be Use by the End User to get the Prompt 
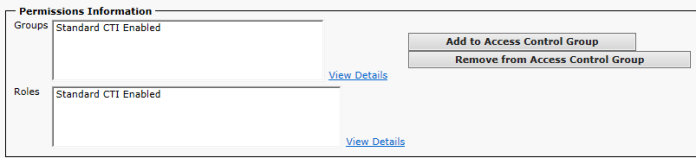
Now Create and Application user and Associate the CTI with it and Give Standard CTI Enable Permission

Now go to Server and Enable Auto Registration
Select the Device Template, line template and Starting and Ending Directory that Phone will take Temporarily 
Finally Now Activate the Service under CUCM Serviceability

now Redirect the user to enter the CTI Number in the Phone and Press the Number it will Ask the User to Enter the Self-user ID
after press the ID which in my Case 7156
it will ask to confirm by pressing Pound and then Phone will Restart
you can see the Video in my Youtube Channel
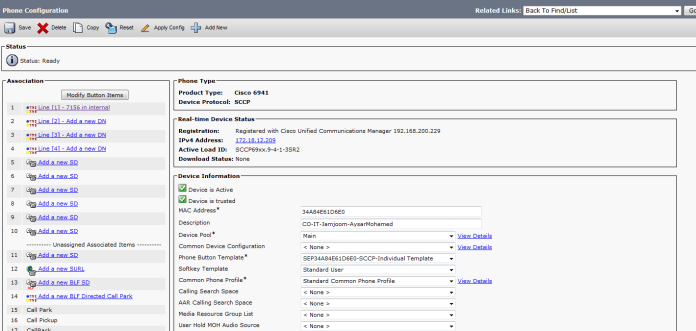
and Finally the Phone Registered by my name and Extension ;D
Smile life Is Beautiful
