Conference

Video Conference

This is the Cisco IP Phone Biggest Feature of all

Video Conference is one of the Major thing in Business were Some Employee reside in another City and you can save time and Money with Video Conference and for Some Business an MCU is not an Option.

The Best thing for it to work You don’t need TelePresence or Meeting Server, All what you need is a PVDM3 Modules weather it  PVDM 3-128 or PVDM 3-265 in your Router and Configure the Conference in the IOS Similar like you do the Normal Conference i already Explain it in an Earlier Blog

I will be configuring Video Conferencing for Cisco 8941 IP Phone and 2 of 9971 IP Phones.

So Let Start Configure the IOS

first i Set the DSP reservation for voice related services Integer is a percentage which is 60 in this Example, That Leave me with 40% to video resources

1

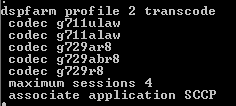
Then Configure the Video Conference Profile

Its Important to  Define the conference-participants parameters and Maximum Sessions so I Define how Many Parties Per Conference and I define Also the maximum sessions

3

Now the SCCP Configuration Part

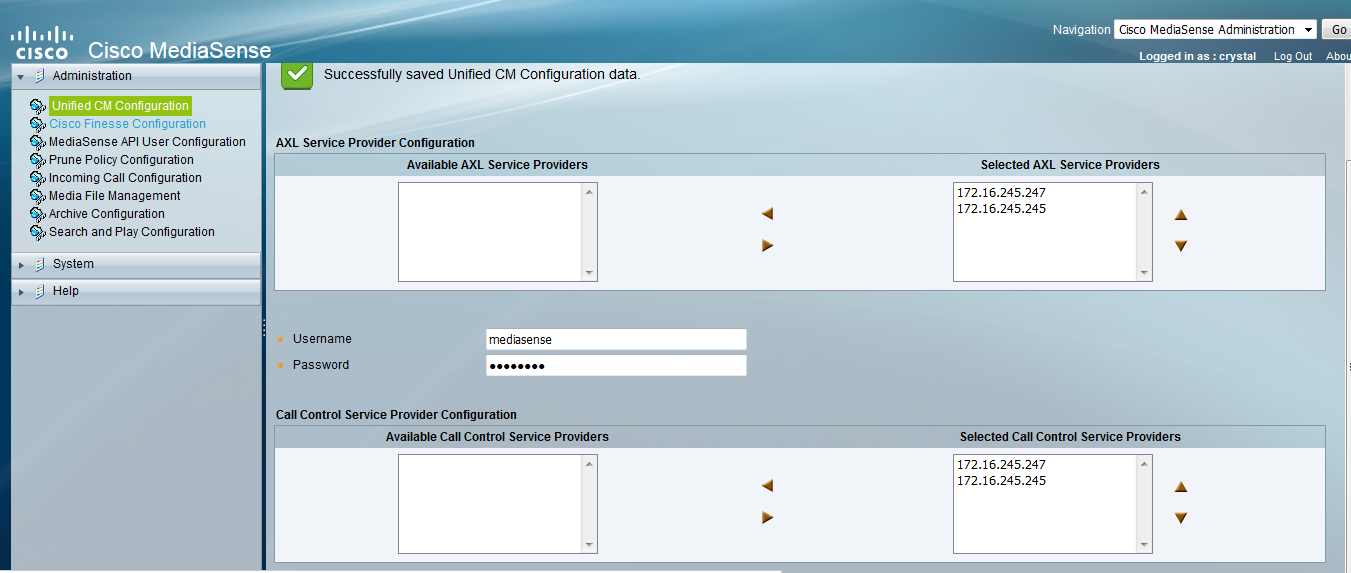
i Define my Call Manager

2

and here i Associate the Video Conference Profile to the SCCP Group
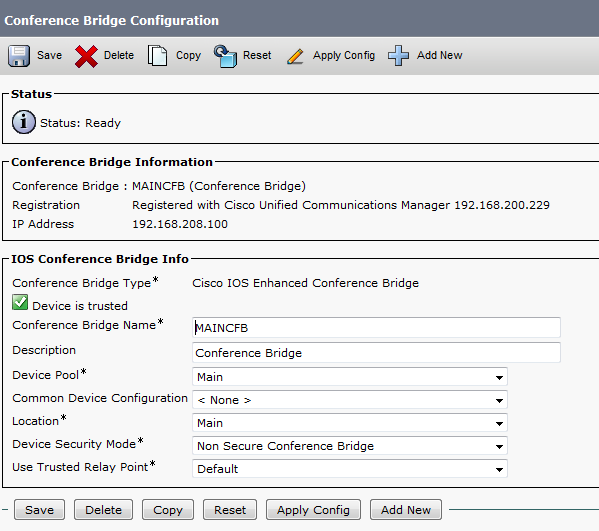
4

Now the CUCM Part

Go to the Media Resource – Conference Bridge – Add New

5

Then  Go to Media Resource – Media Resource Group – Add new and Select the Video Conference Resource that you Just Configure

6

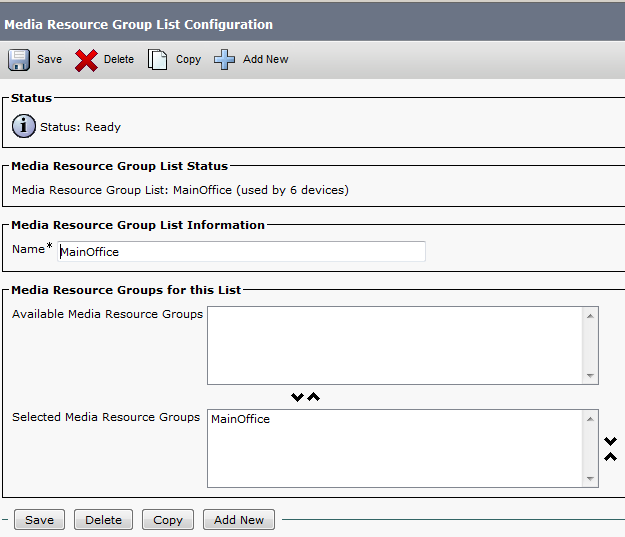
Then  Go to Media Resource – Media Resource Group List – Add New and Select the Media Resource group

11

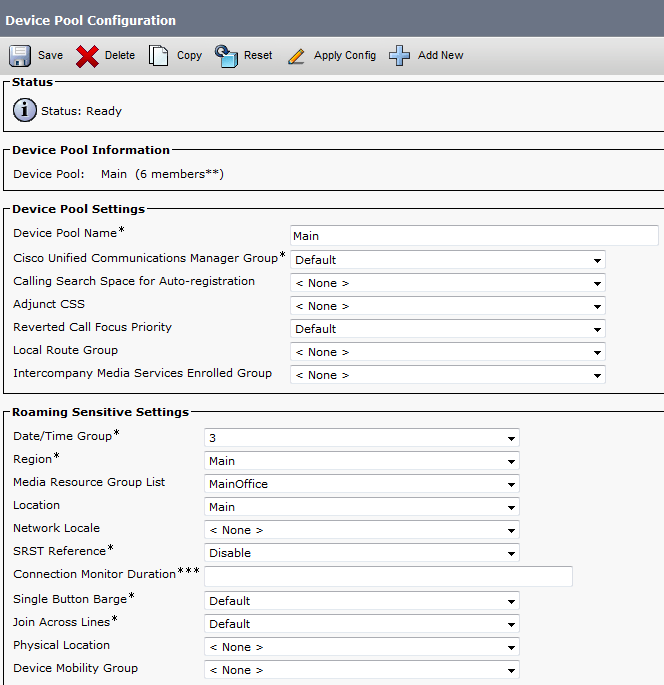
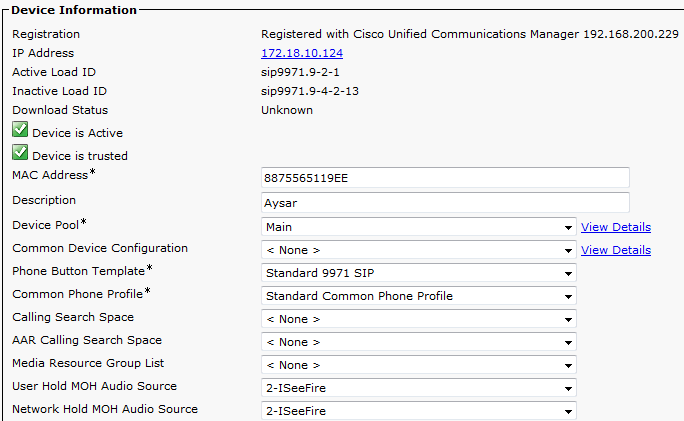
Finally Assign the Media Resources Group List to the Device Pool

12

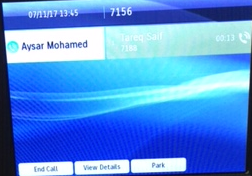
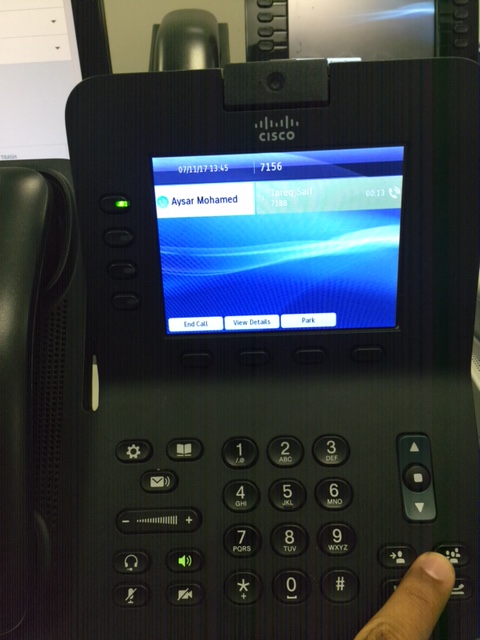
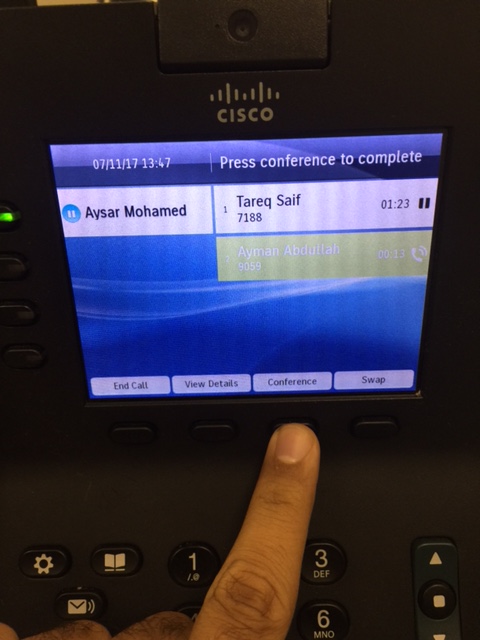
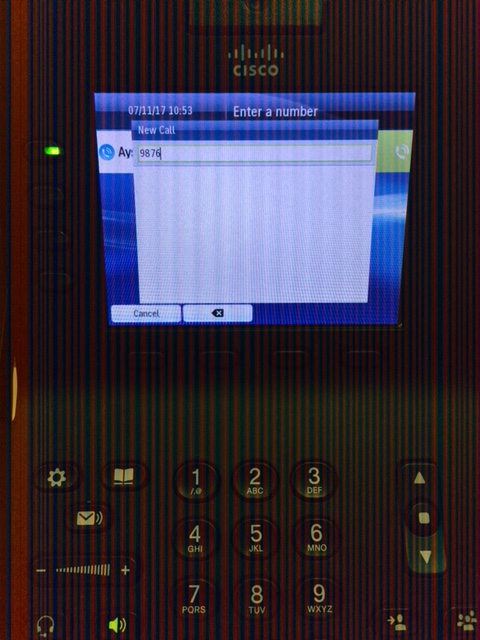
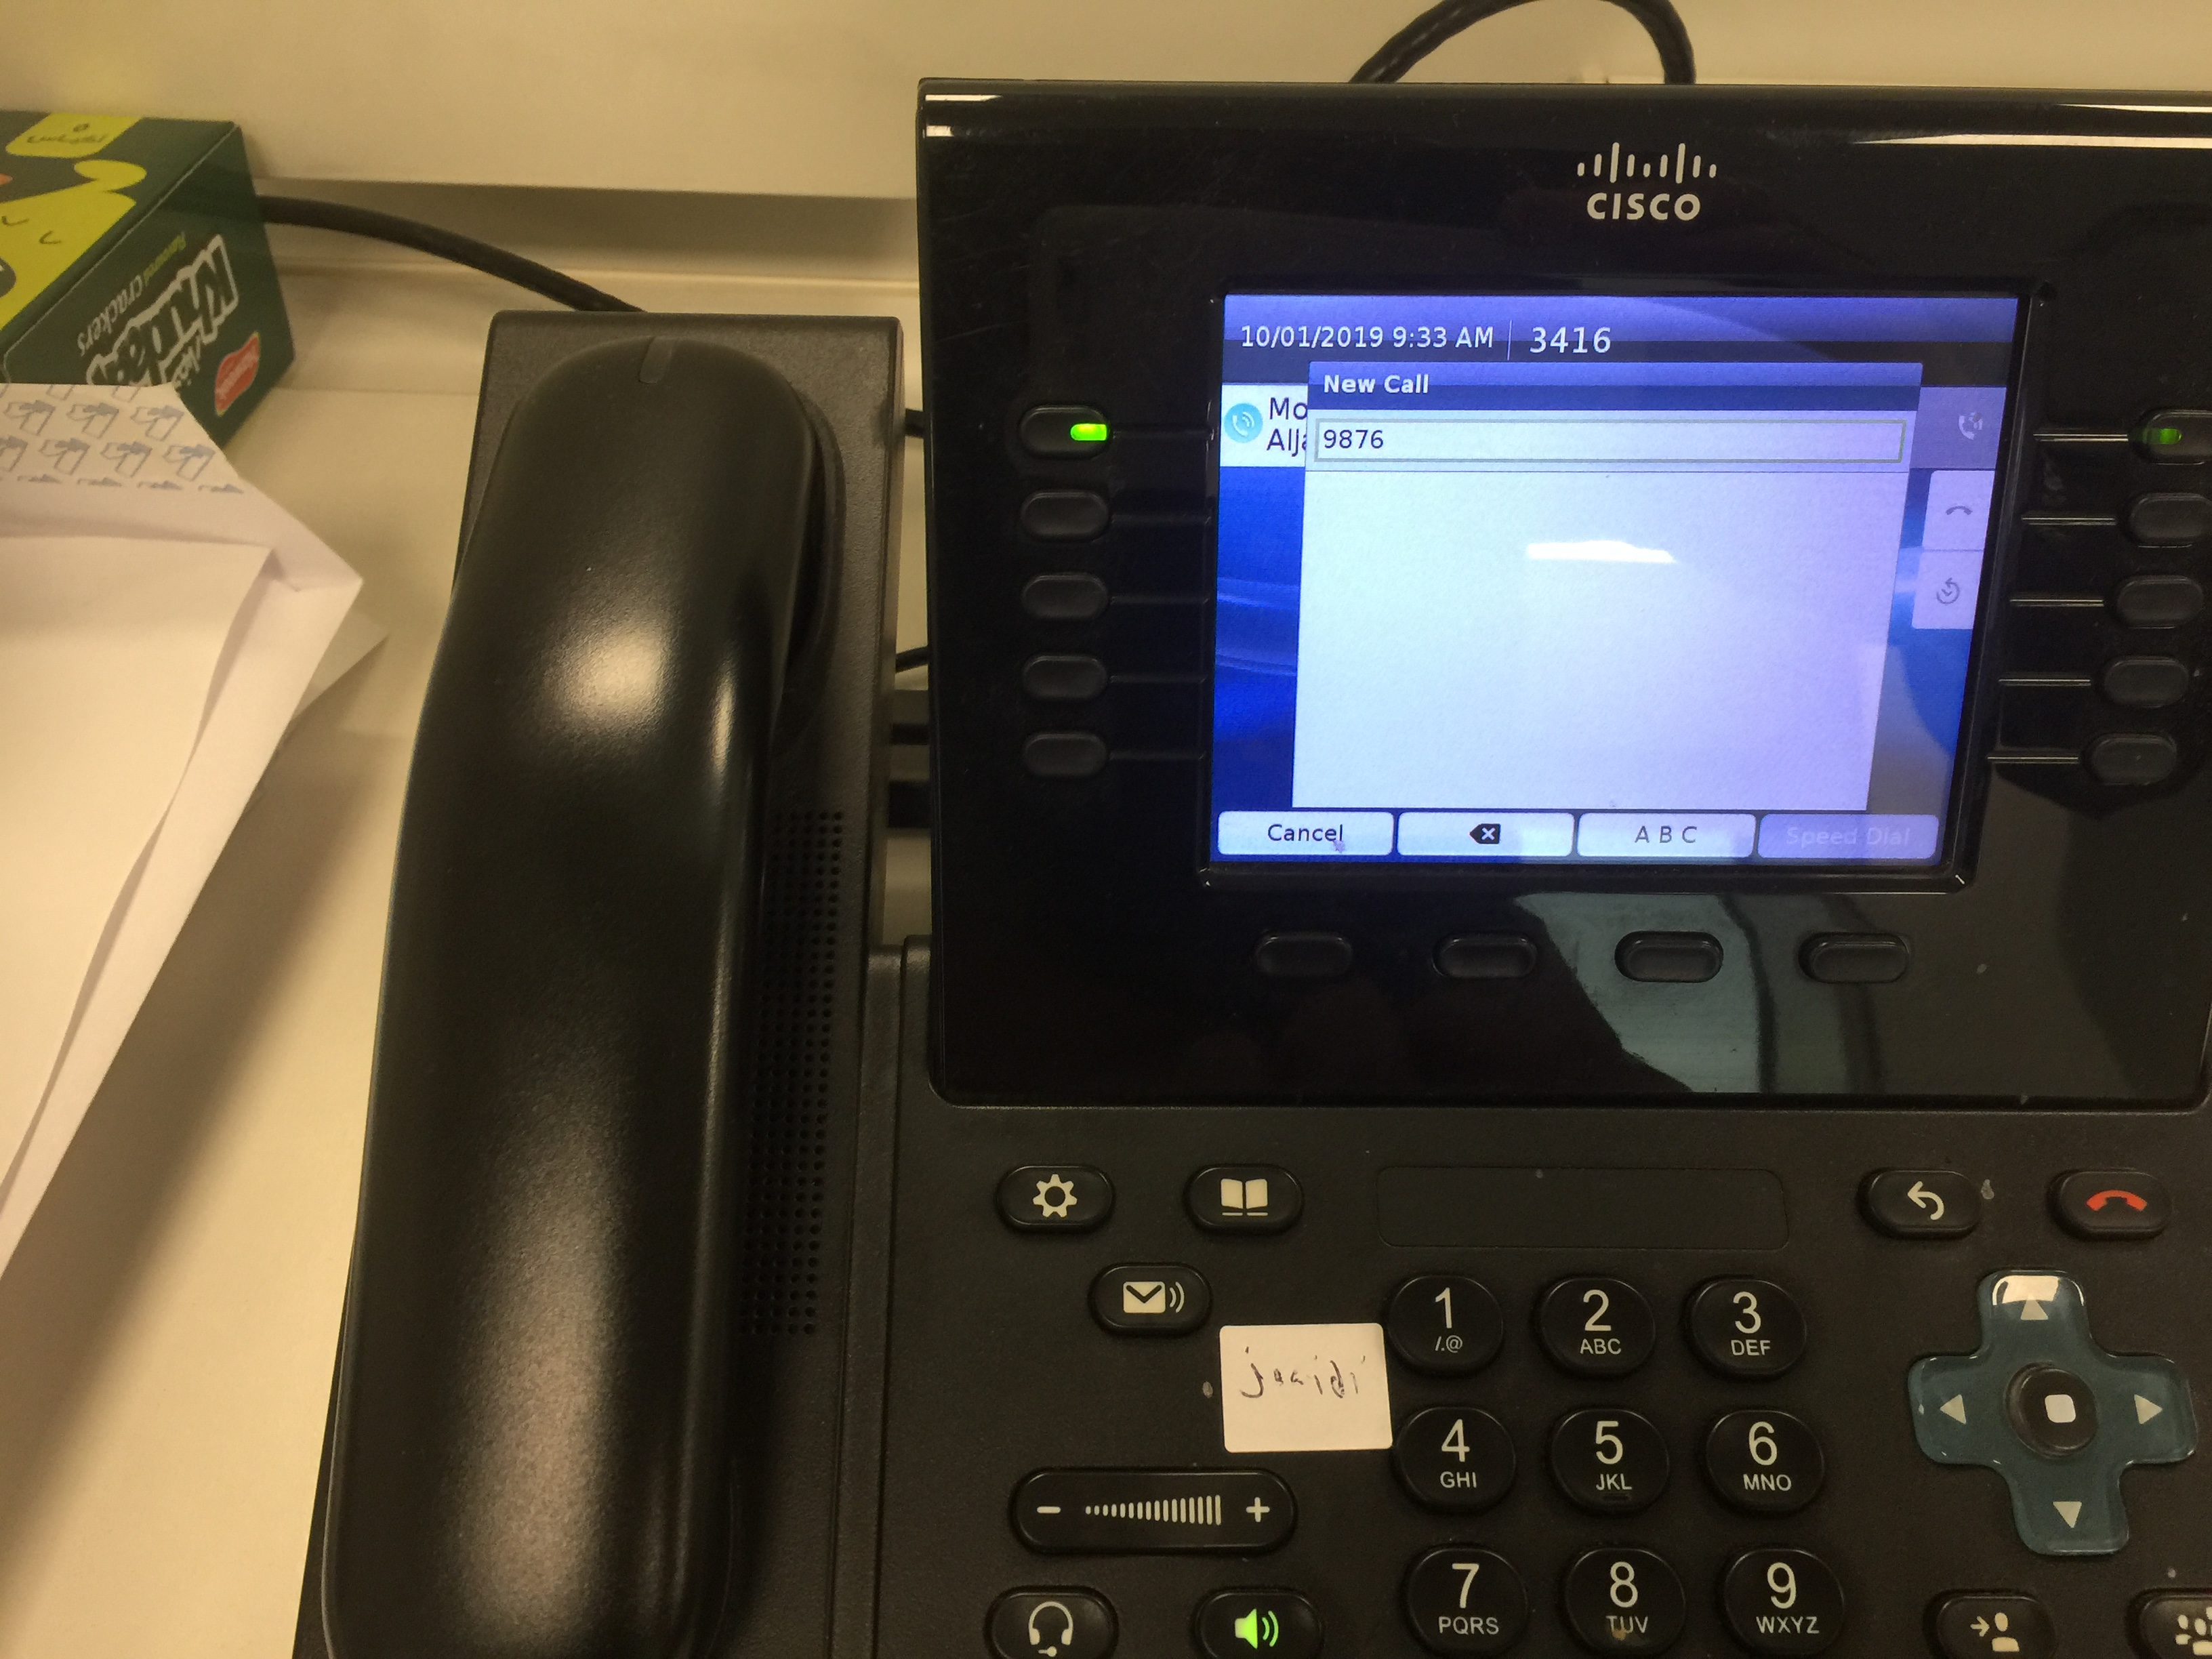
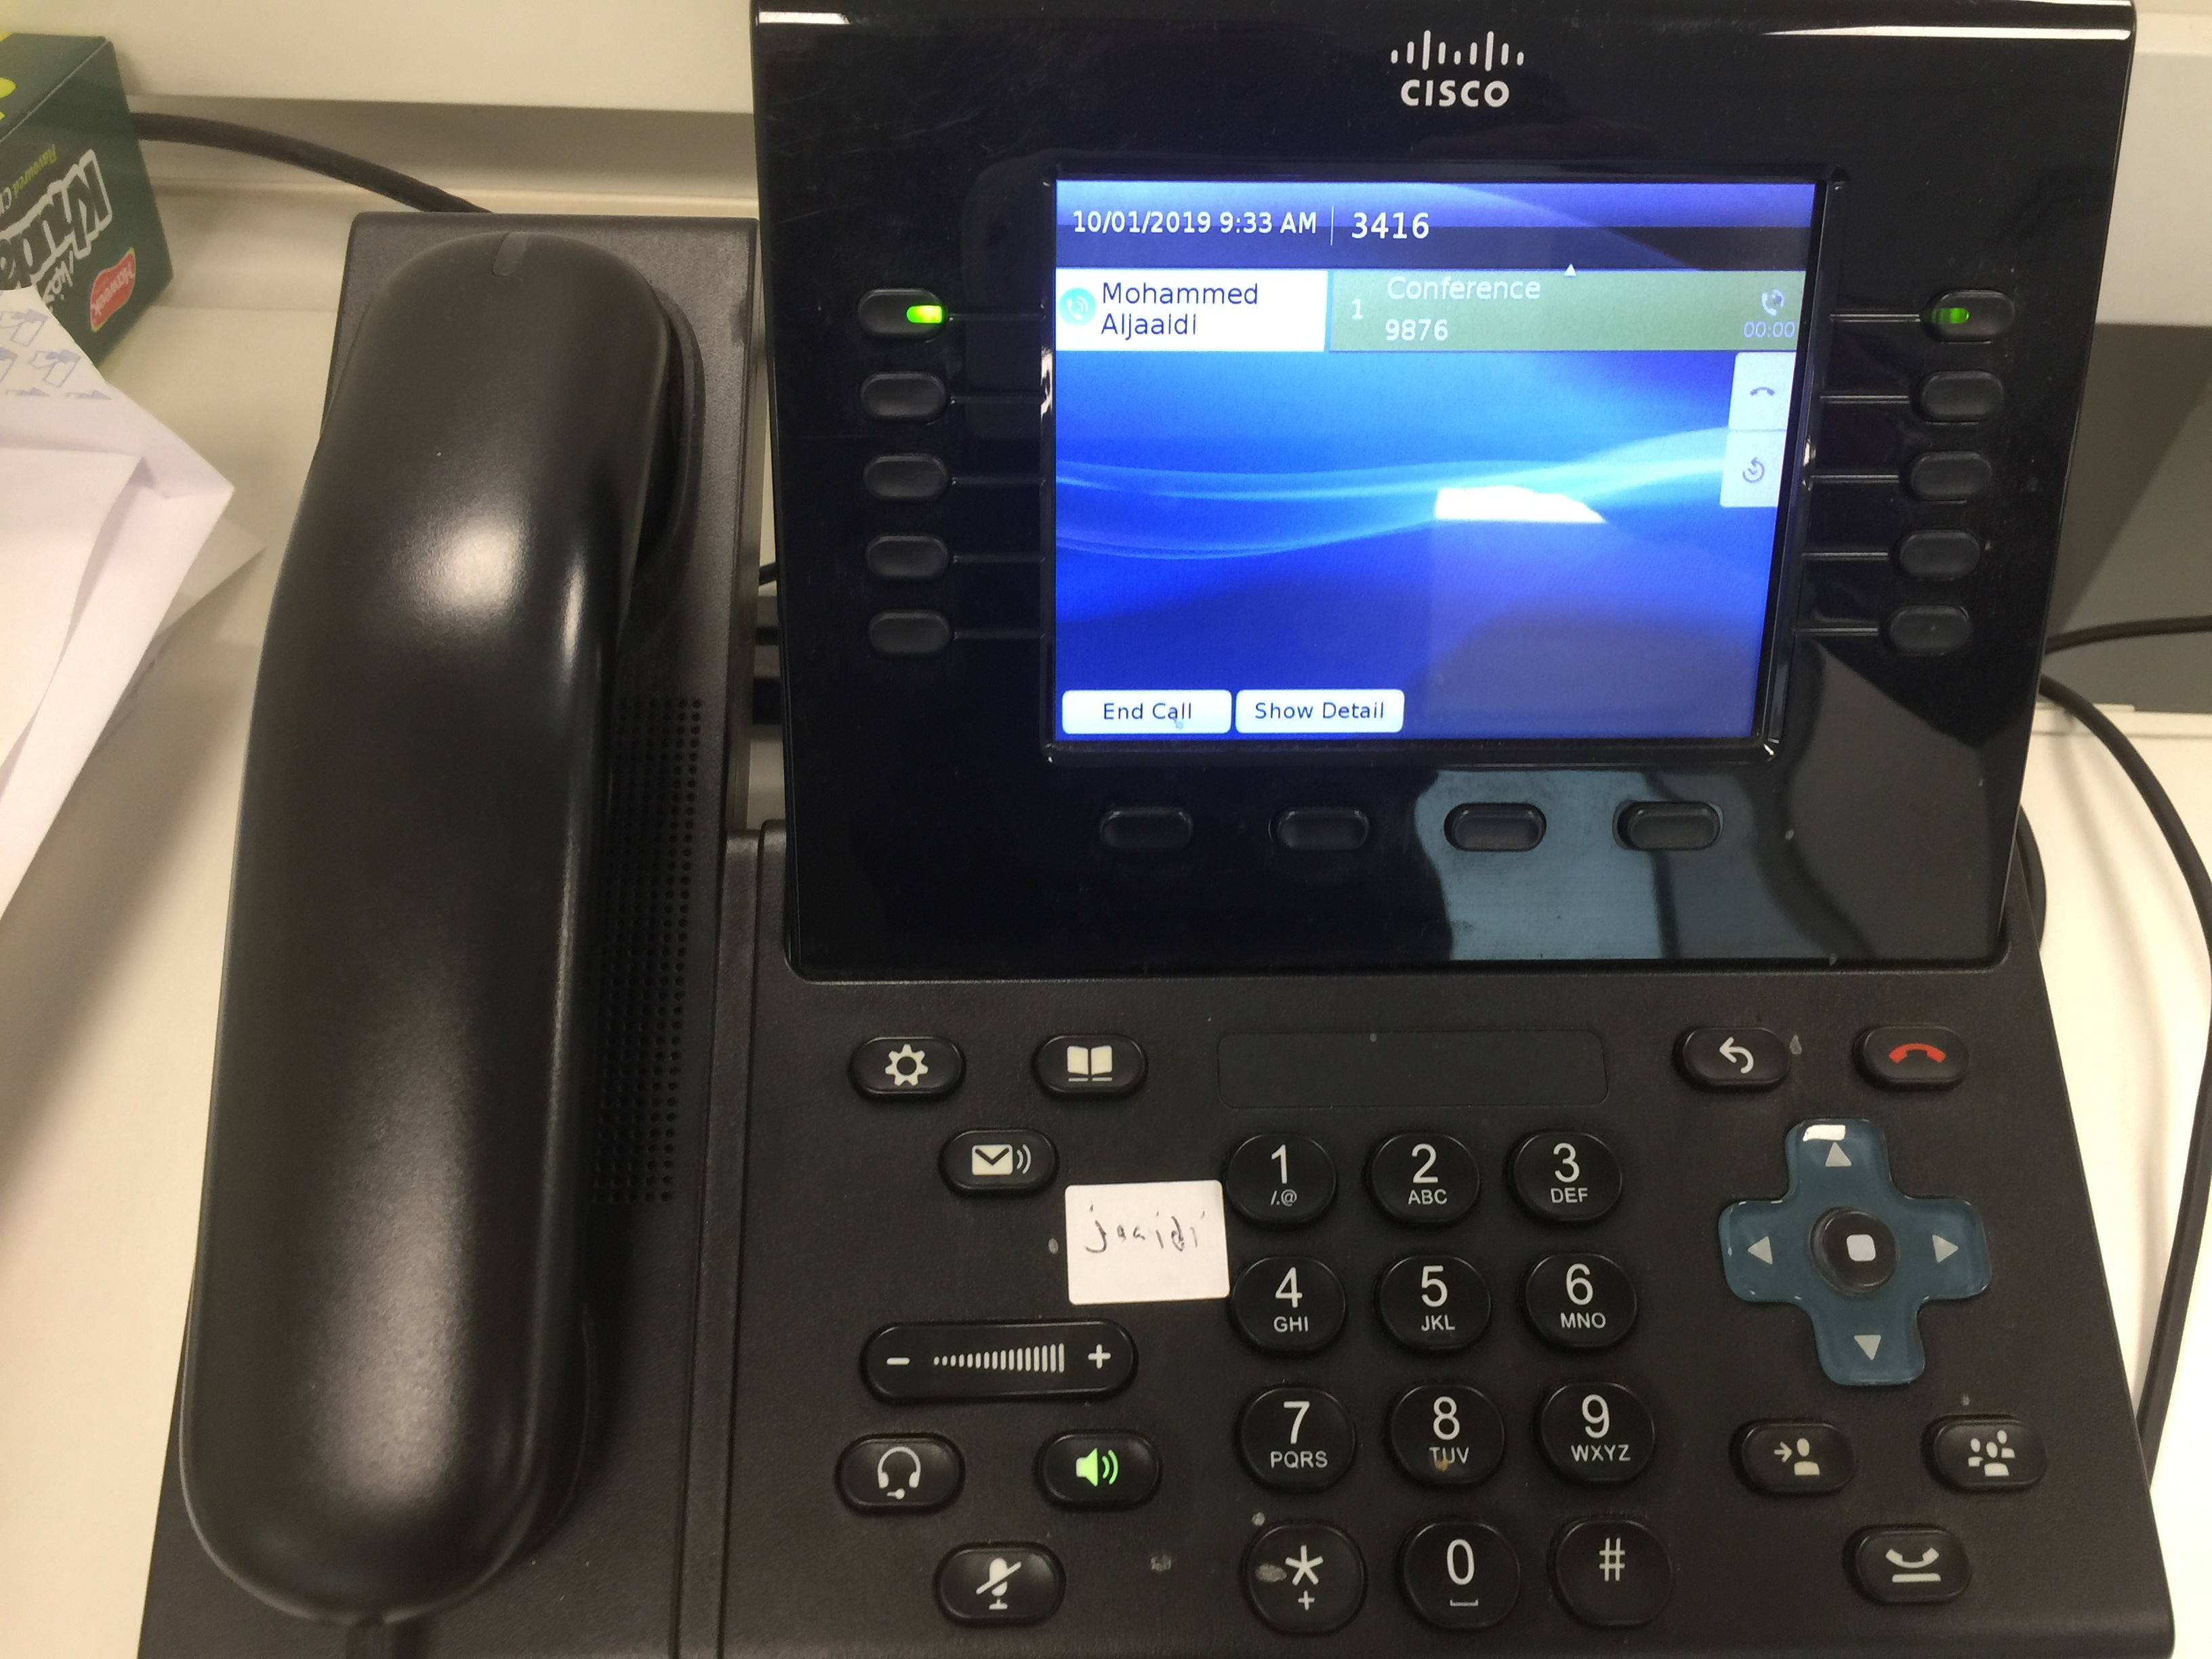
Now make a Call to from Phone A (7156) to Phone B (4119) then i Add by Using the Conference Button https://i0.wp.com/www.cisco.com/c/dam/en/us/td/i/200001-300000/250001-260000/255001-256000/255303.eps/_jcr_content/renditions/255303.jpg and Add Phone C (2131) and Press the Softkey Conference and Just Like that you have a Video Conference

you can watch the Video in this Link
or you can see it in the video below

Note. Cisco release a Feature Deprecation Announcement for Video Conferencing and Transcoding Using PVDM3 on ISR G2 Product Bulletin Feature Deprecation Announcement for Video Conferencing and Transcoding Using PVDM3 on ISR G2 Product Bulletin were saying “This feature will be disabled with Cisco IOS Software Release 15.5(3)M” so in case you want to use it Youre going to have to roll back to an older release.

Standard
Conference

Ad Hoc Conferencing

Conference Cant get Any Easier  ;D

I already explain in earlier blog the other Conference Feature Meet-me and in my Believe Ad-Hoc is the Advanced feature of Conferencing

in Ad-Hoc the Initiator of the Conference which is the Controller would have the  ability to view the List of the Other Parties, to Remove Some of the Parties. Also you can provide this  Feature to the other parties to have same capabilities of the controller

First just like Meet-Me you need to have conference resources available on you router before you can use any conference features i already explain how to configure a Conference Bridge in earlier Blog Media Resource Group

no other configuration needed

so to start conference first i will go to My Cisco 8941 phone and Make call for the First Parties which in my example is extension 7188

Untitled

After the first parties answer then I Press the Conference Button

Conference Button.png

on the 8941 and Call Second Parties extension number 9059

IMG_6697

IMG_6702

After 9059 answer then press Conference Softkeys to Add him to  the Conference

IMG_6705

And it’s now everyone join the  Conference and you can add as many user that your Conference Resource can support

You can view the List of Parties by press View Detail Softkey

IMG_6707

Detail

Also you can select a user and remove him from the Conference

IMG_6709.JPG

its a really great feature and user will not have to go through System Administrator to ask for a Number to call like Meet-me Conference were you need it

to adjust your conference to protect your self from toll fraud you can configure the call to be terminated once the controller drop the call

Go to System – Service Parameter – Select the Server and Choose the service (Cisco CallManager ) then go to Clusterwide Parameters (Feature – Conference)

Drop Ad Hoc Conference : When Conference Controller Leaves

10

Also if i want to other Parties non-Controller to View List of Conference parties and Remove other Parties i will go to System – Service Parameter – Select the Server and Choose the service (Cisco CallManager ) then go to Clusterwide Parameters (Feature – Conference)

Advanced Ad Hoc Conference Enabled : True

20

Also you can increase number of Parties to join conference, the default value for this Clusterwide Service Parameter is 4.

;D

Standard
Conference

Meet-Me Conference

So i got request from one of the Top Manager in Jaguar Land Rover to have a way to make a conference in his phone for Daily basis

will conferencing one of the most important things in any Enterprise this days,  it save traveling and timing and get to the point ASAP.
Cisco made the implementation of conference easier with Meet-Me Conference so let me guide what you will do when a user Ask you to get to a meeting

So lets go to the Configuration part

First requirement is to have conference resources available on you router before you can use any conference features i already explain how to configure a Conference Bridge in earlier Blog Media Resource group

so after that go a head to Call Routing – Meet-Me Number/Pattern – Add New
Choose a unique Number Ex.: 9876 and partition

1
in case you have a custom Softkey template Then Add the Meet-Me Softkey to the Off-Hook state
(another option is to configure the Meet-me as a button)
Go to Device – Device Settings – Softkey Template – Add new
i named it (Meet-Me)
2
Then Go to on the right corner to Configure Softkey Layout
then select the state Off-Hook from drop down
and Move the Meet-me to the Selected Softkeys and Save
3
Now go to the phone were  you need to initiate the Meeting and Assign the New Softkey template to it which we configure
4So to Procedure
go to the Phone to initiate the Meeting
while the phone in  off hook state press softkey meet-me and press the Number which we configure earlier 9876 which is Meet-me Directory number
IMG_6689
After that put the Meet Me unique number 9876IMG_6690
and Like that you enter the Conference RoomIMG_6691
now go the other Parties and Let them just call 9876 simply like they dial any directory number
2.JPG
and Walla they Enter to the Conference Room3.JPG

and that’s a wrap

**the meet me can hold as many Parties as your resource can support**

Standard
CUCM, Media Resource Group, Uncategorized

Media Resource Groups

The Most Important Element in CUCM World is the Media Resource. it’s used in order to allow an administrator to allocate media resources to particular devices.
There are five types of media resources available in Cisco:
Annunciator, Conference Bridges, Media Termination Point, Transcoder and Music On Hold
Annunciator is uses Cisco media streaming application service to play prerecorded announcements

Conference Bridges Without Saying it explain it self and can be either software or hardware applications

Media Termination Point or MTP can be used to transcode G.711 a-law audio packets to G.711 mu-law packets and vice versa. CUCM Software MTP can only work for G711 codec, however IOS MTP can have multiple codes

Transcoder when two Phones using different codecs would not be able to communicate so here were the Transcoder Job Come
Such Case Like conferencing, CUE use only G.711 so if another Coded used you need Transcoder, UCCX Support G.711 or G.729 so in case you need Both you need a Transcoder. Forward and transfer Call in case of Different Codec Also you need a Transcoder.

Music on Hold is the Boring Music that everyone hear when someone put us in hold ;D

So here i will guide you on how to configure my 4 Most Charming Feature (MTP, Transcoder, Conference and MOH)

First We start by Configure the IOS Side
Allocating DSPs to a DSP Farm on Router
1

Then i Start to Configure the DSP-farm profiles for Each (MTP, Transcoder and Conference)
3

4

5
Note.Make Sure to Issue Command No Shut after Each Profile Configuration
After the profiles are set up i start by the SCCP Configuration
The routers use their Gigabit Ethernet 0/0 interface as the SCCP source interface, and the primary Cisco Unified Communication Manager should be 192.168.200.229 which my Publisher and for Better Practice it should be the Subscriber but i Only have one in  the Lap

2
Last thing in IOS I Configure the SCCP Group
associated the CUCM with priority
associated Each Media Profile and Register with a name that i will use later in the CUCM Registration

6

Now the CUCM Part first start with MTP
go to Media Resource – Media Termination point – Add New
Select Cisco IOS Enhanced Software Media termination point
put the Name in the IOS which (MAINMTP)
Select the Device pool
Save – Reset
7
Now the Transcoder
go to Media Resource – Transcoder – Add New
Choose Cisco IOS Enhanced Media Termination point
Choose Device Name Configured in IOS Whcih (MAINXCODER)
Select the Device Pool
Save – Reset8
and Last the Conference
go to Media Resource – Conference Bridge – Add New
Choose Cisco IOS Enhanced Conference Bridge
Choose Device Name Configured in IOS Whcih (MAINCFB)
Select the Device Pool, Location and Device Security Mode as Non Secure
Save – Reset9

Last But Not Least to Configure MOH
Add the Audio File
Media Resources – MOH Audio File Management – Upload File From Desktop
1
2
3
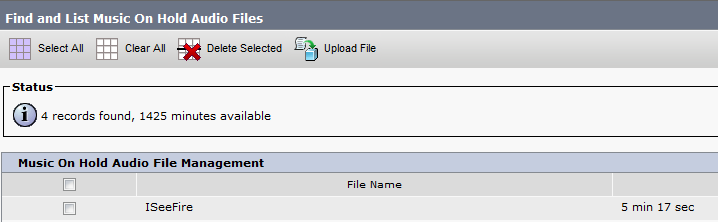
Then Create an MOH Source
Go to Media Resources – Music On Hold Audio Sources – Add New
Choose Number and Select the Audio Source that you Just Upload
4
Last Thing is to Configure the MOH Server
Go to Media Resources – Music On Hold Server Audio Sources
Select the Device Pool, Location
Note.in Case of Multi Casting then you need to Check the Box for Enable Multi-cast Audio Sources on this MOH Server5
Now Assign the MOH to the Phones
7
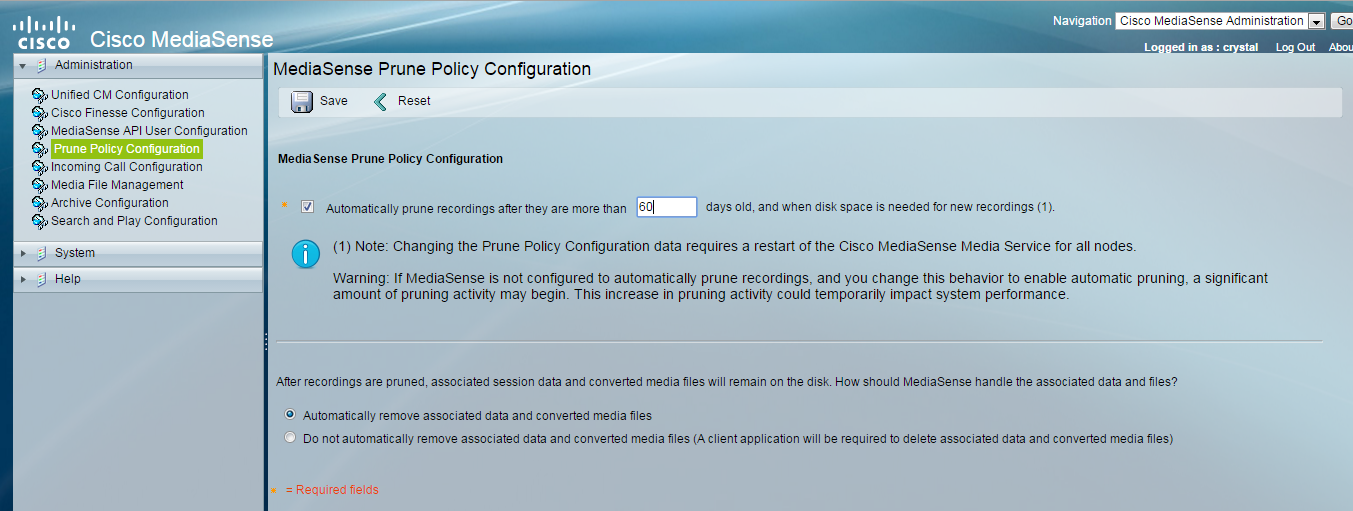
Finally we Done with the Resources, it’s Time to add them all Under one group
go to Media Resource – Media Resource Group – Add New
Name it in my Case i Name it (MainOffice)
Choose the Resource you Just Configured (MAINMTP, MAINXCODER, MAINCFB and MOH_2 (MOH))
Add them
Save
6
Note.Also be Aware in case of Multi casting you need to Check the Box Use Multi-cast for MOH Audio (If at least one multi-cast MOH resource is available)
Now Create an Media Resource List and add the Group to it
go to Media Resource – Media Resource Group List – Add New
Name it in my Case i Name it (MainOffice)
Choose the Media Resource Group I Just Configured
11
Finally Assign the Media Resource Group List to the Device pool 12
And Done
now you Allocated the Media Resource List i Configure for Each Member of this Device Pool

For Conference check this Link
For Music on Hold Video check this link

Standard
BAT, Uncategorized

Cisco Bulk Administration Tool (BAT)

I Call this : The Quick and dirty way

in earlier post i explain the Latest CUCM 10 feature SELF-Provisioning  were End user should input His Self-Service user ID to Provision a phone.
Today  I guide you through the most powerful tool of Cisco Unified Communications Manager mainly use to insert users, phones …etc.
BAT is an Old Feature for CUCM and usually use during big phone deployments.
please refer to Cisco Web for a complete guide on how to use bat.
i am here only to explain to you how to add Phones using BAT.

First Go to Bulk Administration – Upload/Download Files – Select bat.xlt and press Download Selected

1

Open the bat.xlt and Excel sheet will open then Choose to create File Format2

Adjust the File as you wish
MAC Address, Description, Directory Number, Line Description, Alerting Name …etc Then press bellow Magic Button (Create)3

it will ask you to overwrite the Excel file just press Yes4

Then Fill the Detail you need and Choose Export to BAT Format
and Save the File in your Desktop 5

Successfully Saved
6

Now Back to CUCM Bulk Administration – Upload/Download Files – and this time choose to Upload a new File
Choose  your BAT that you saved in Desktop and Select the transaction Type then Save.
it will be uploaded7

Now go to Bulk Administration – Phones – Phone Template -Create New one for the Specific Phone Model
8
Configure your Device pool, Phone button template …etc9

10
Then Configure the Directory line, Partition and Calling Search Space11
After That we need to Validate our BAT File with the Phone Template
go to Bulk Administration – Phones – Validate Phones
Select the  BAT and Phone Template
12
After that to check everything gone correctly go to Bulk Administration – Job Scheduler
it successfully Validate13
you can also check the text Report14
Now time to insert the Phones
go to Bulk Administration – Phones – Insert phones
Choose the BAT File and Phone template & Run Immediately15

Again you need to check everything gone Smoothly so
go to Bulk Administration – Job Scheduler
it Successfully Passed16
Also Check the Text To for any Error
17

Here is the Best part when i see My Phone Registered Just Fine ;D18

Standard
Prime Collaboration Deployment, Uncategorized, Upgrade CUCM

Upgrade CUCM 8.6 to 11 Using PCD

Performing upgrades and migrations of CUCM has always been a long, manual process that required lots of staging and prepping as well as after-hours work.  With the release of version 10.X Collaboration Suite, a new product called Cisco Prime Collaboration Deployment (PCD) was released.
It allows the user to perform tasks such as migration of older software versions of clusters to new virtual machines, fresh installs, and upgrades on current clusters.In summary automates upgrade and migration task.
Once PCD is installed and configured, it can be used to perform a variety of tasks cutting down on the amount of time and frustration of a large manual migration.

Supported Releases for the Upgrade Task on PCD Version 10.5

These include releases for the upgrade task on the Upgrade Application Server or Install COP files:

  • Cisco Unified CM Releases Supported: 8.6(1-2), 9.0.(1), 9.1(1), 9.1(2), 10.x
  • Cisco Unified Presence (CUP) Releases Supported: 8.6(3), 8.6(4), 8.6(5)
  • Cisco Unified CM – IM and Presence Releases Supported: 9.0(1), 9.1(1), 10.x
  • Cisco Unified Contact Center Express Releases Supported: 9.0(2), 10.x
  • Cisco Unity Connection Releases Supported:
    • From 8.6(x) to 8.6(x)
    • From 8.6(x) to 9.x
    • From 9.x to 9.x
    • From 10.0(1) to 10.x

This document is focused on the upgrade task on PCD Release 10.5.I show in an Earlier post the steps for Installation of PDC https://ccieroot.com/2016/03/23/installation-of-cisco-prime-collaboration-deployment/

I spend the last couple of weeks searching in internet for a way to upgrade from 8.6 to 11 and there was no single resource i could catch to it so i made my OWN

Note.The test been Done on UCSC-C220

So let’s Start
First Download the RSA Keys from Cisco Web Site

RSA keys are used to sign Cisco Unified Communications Manager releases and other updates such as Phone Firmware, Locales, Dialplans, other cop files. This cop can be installed on any UCM or see README for versions needing this cop.
ciscocm.version3-keys.cop.sgn
and put it in your SFTP Folder and Upload to your CUCM 8.6
1
Fill the SFTP Information
2
Choose the RSA Key
3

4

56
Then i will upload the Image to PCD through Filezilla
1
First Create a Site Manager2
Add the IP of your PCD and use Admin username : adminsftp & Password:same one used for web  login in PCD3

4
Press Ok
5
Now you are inside the PCD Directory if you need to upgrade an existing Cluster then copy the ISO to the Upgrade Folder if you want to create a new Cluster then copy the ISO to the Install Folder
In our Case i want to upgrade
1a

Select the ISO Image and Choose Upload4
Now the Upload Start
5
Now it’s Complete and the ISO Available Under your Upgrade Folder on the right and also you can check your Data store in the web page
4.png
Login to the PCD
232425
I can check my ISO Image from Administrator Tab – SFTP Datastore
6
Now To Add a Cluster go to Inventory – Clusters – Discover Cluster1
Fill the Cluster Information2
3
Then Choose to Assign Function to the Server4
Choose the Function that this CUCM is Providing5
Now we add the Cluster Successfully
6
Next Task is to Upgrade
From Task Tab – Upgrade
Then Choose to Add a New Upgrade Task
1
Select from the Drop Down the Cluster and the Product2
Browse From The SFTP The ISO Image
3
If the Image is not Valid or not Supported it will not Show when you select
“Valid Files Only”7
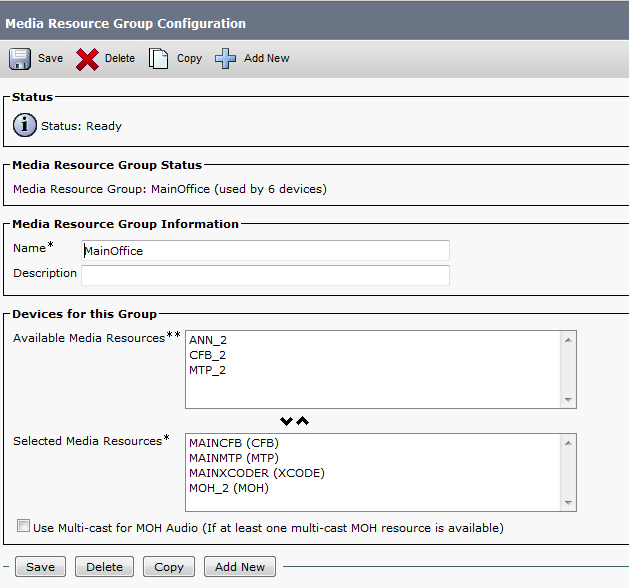
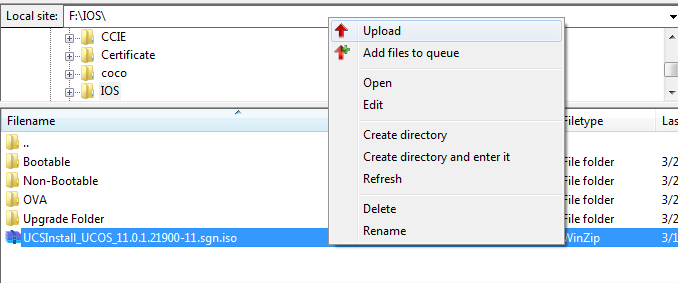
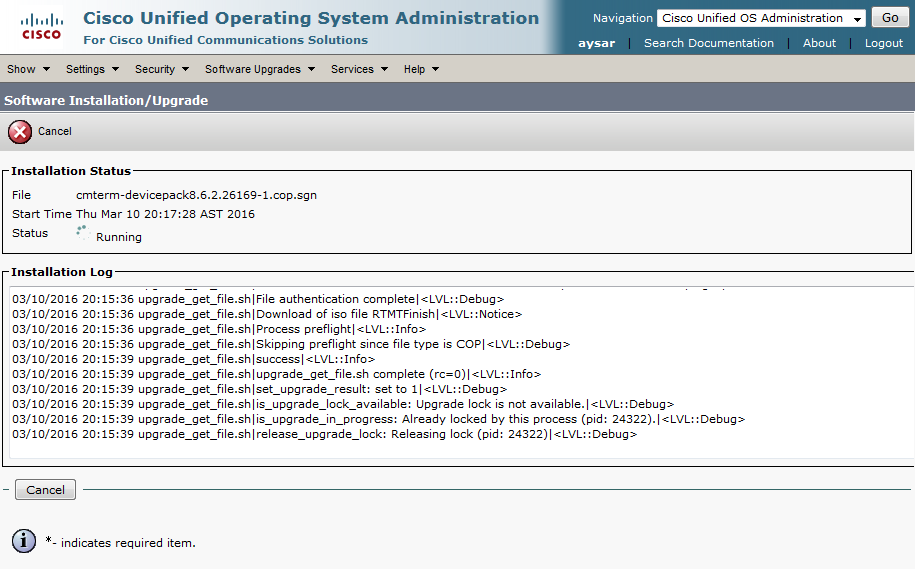
Choose to Start Task Manually or Schedule and Choose Automatically Switch to the new Version After Successful upgrade6
you can Also Specify the Sequence 7
Review the Task Steps5.png
The Task been Added Successfully9
Now go to the right and click on Start Task Immediately 10
From Monitoring Tab you Can see your Task  8.png
or Press View Log and see what happening 12
You can Watch the Installation through the CLI Page
the system shutting down
6
Then the Installation Process Start8

9
Now Finally it Finished and it Switched to the New Image 11.0.110.png
And in the monitoring Page it show the task finish successfully on the PCD Page
9.png
Now Login to the Web Page

11.png
and Here the new CUCM Page and it shows the System Version 11.0.1 and you only need to upload the new License
11.png

;D


Standard
CUCM, UCCX

MediaSense Call Recording

Call Center Recording helps organization reliably record and evaluate calls for best training and quality assurance.
Media Sense is a Rich software solution for Cisco IP telephony and Contact Center. It’s provide call recording and live monitoring for Active calls

The Installation is basic just like any Cisco product (CUCM, UCCX …etc)
so i will start by the MediaSense Setup wizard and Requirement

First CUCM Part
create an AXL User I name it mediasense
User Management – Application User
1
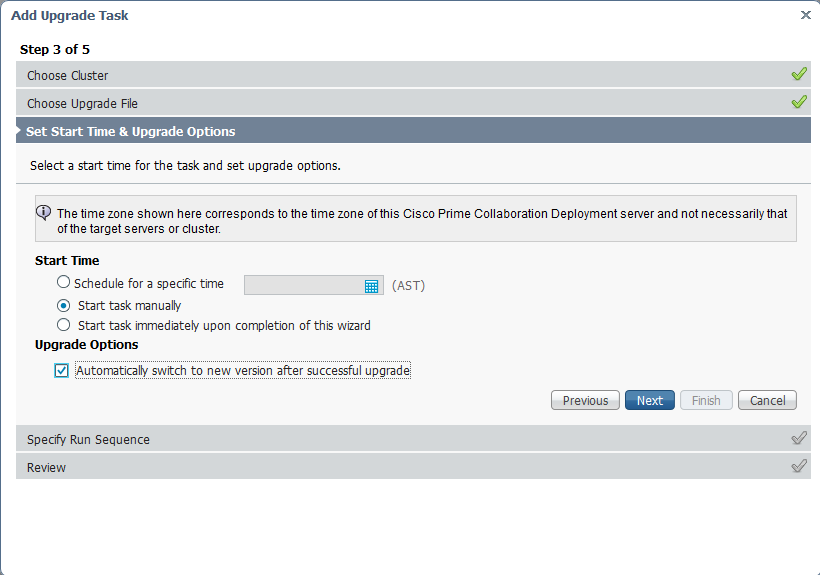
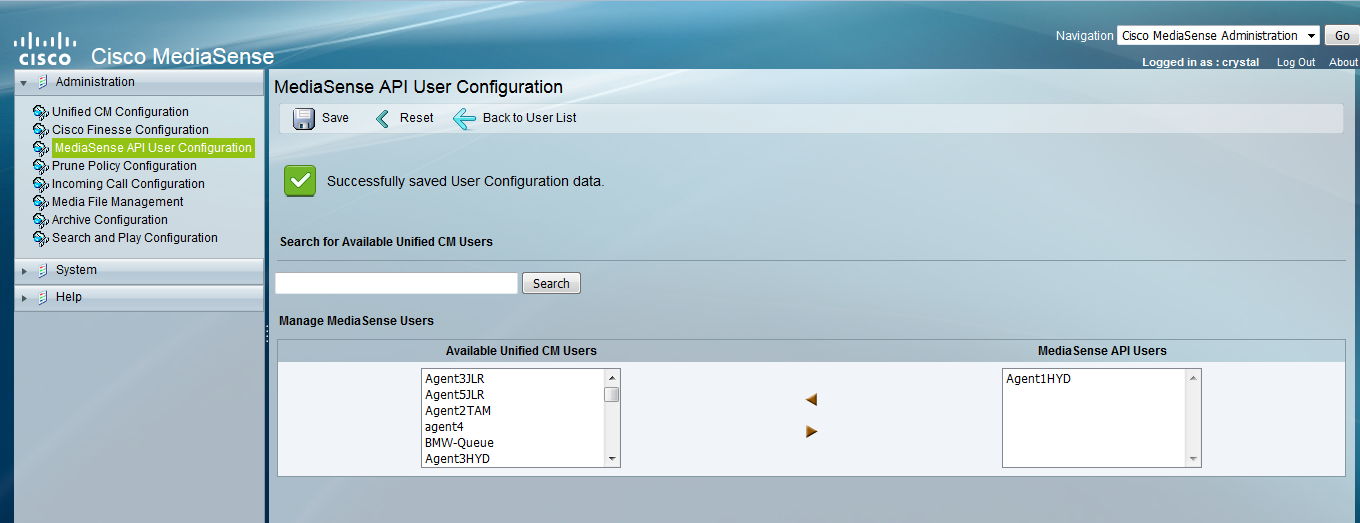
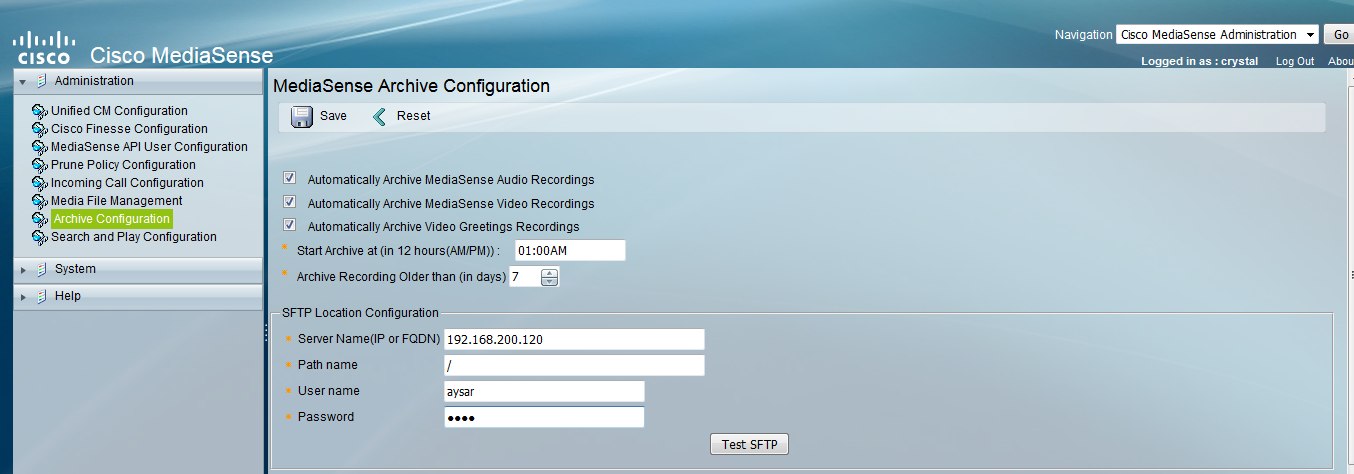
Second Create a record profile I give it Destination address2
and Assign this to the Agent Directory Number Whom you want to Record
7
now back the phone page & enable the Built in Bridge
Built in Bridge

Most Important Step is to Create a Transcoder and Assign it to the Device pool

Then Create a SIP Trunk to the MediaSense Server
our MediaSense IP Address is 172.16.245.244345
Last create a Route Pattern to the 399 and Gateway is the MediaSense Trunk that you created earlier6
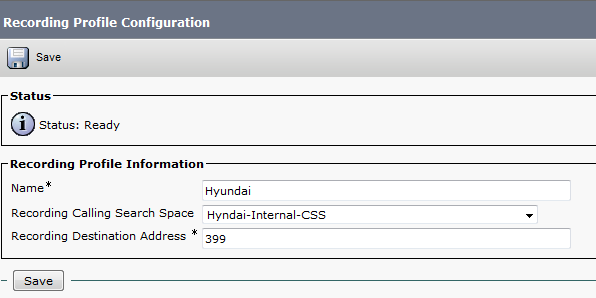
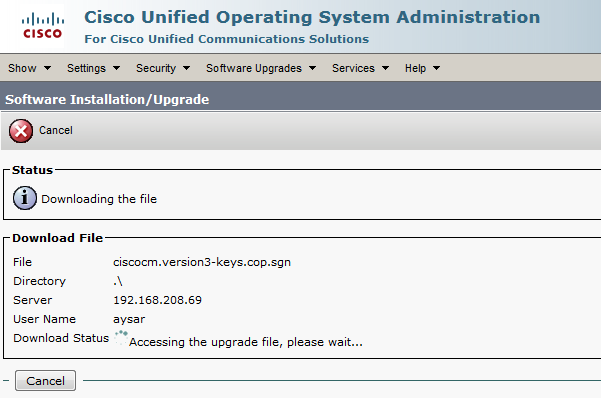
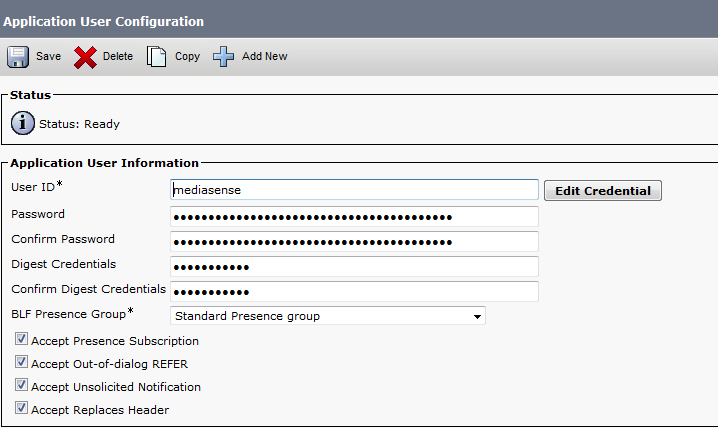
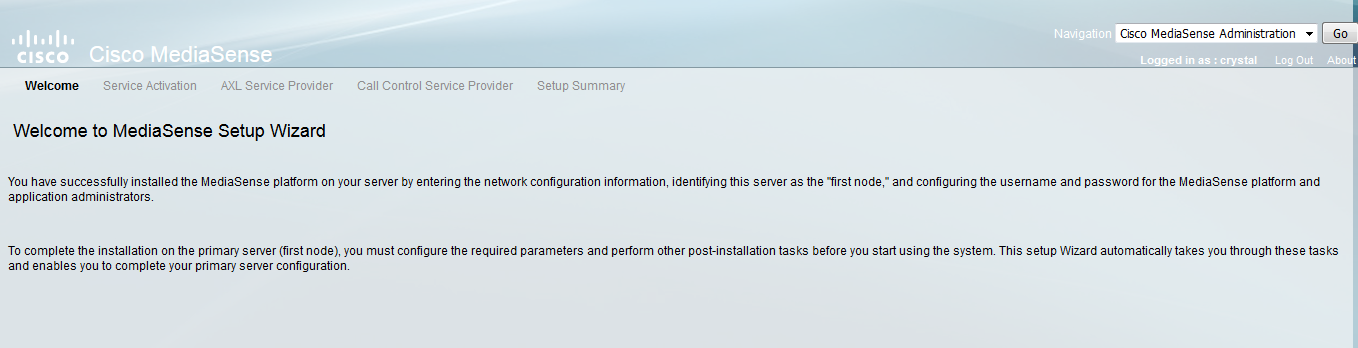
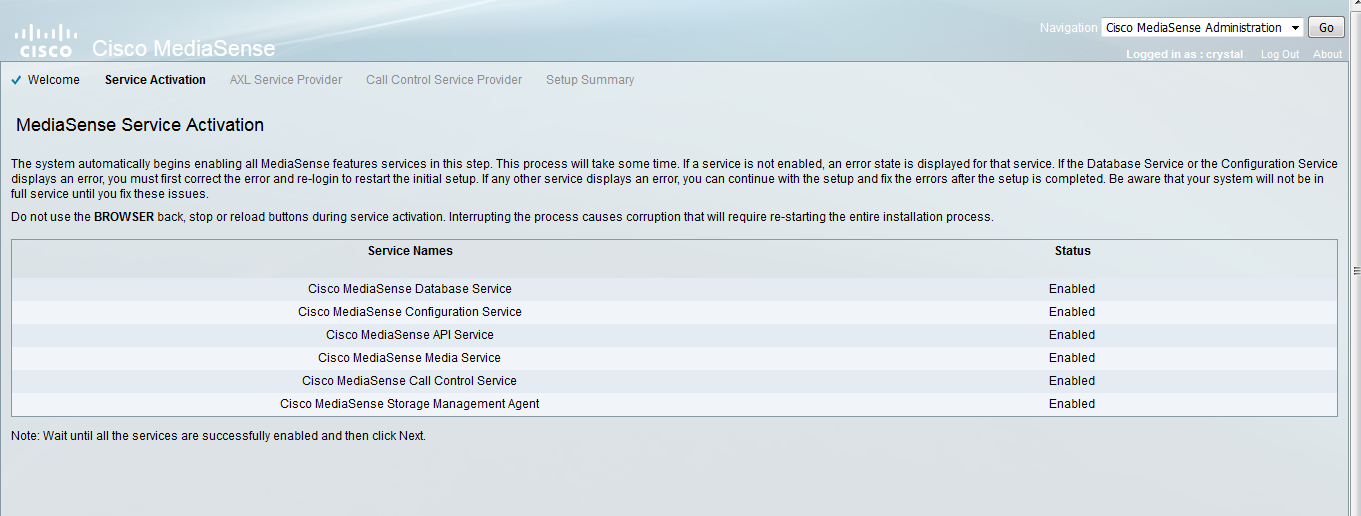
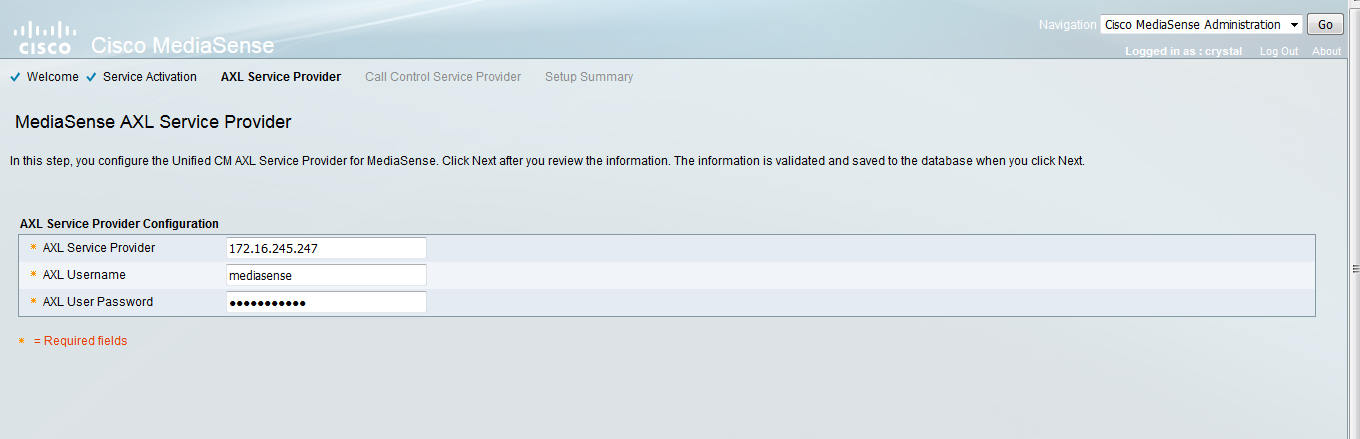
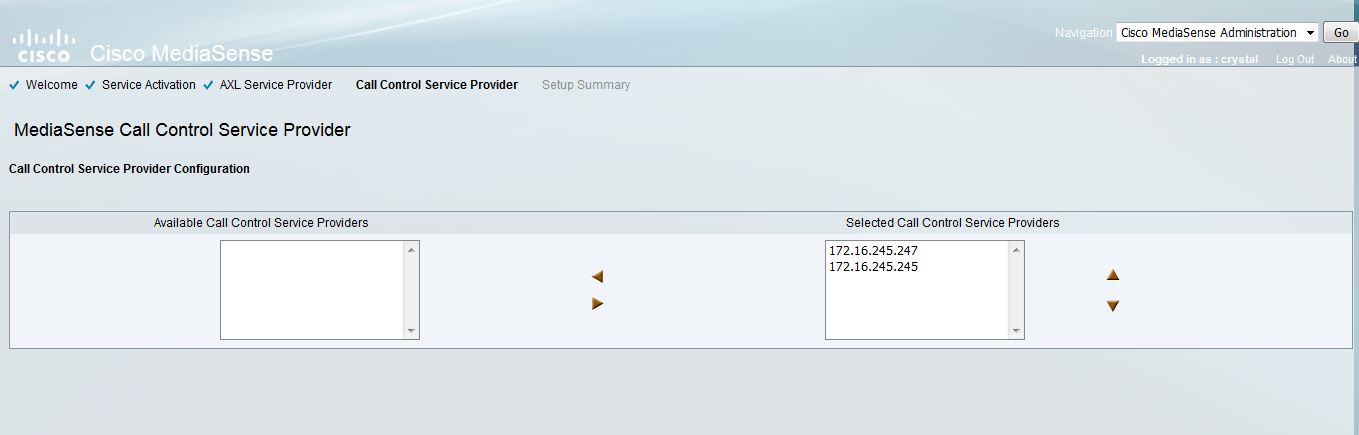
Now Let’s start from the Media Sense Setup Wizard
1.png

2

3
Enter the IP Address of the CUCM and AXL username and Password
4
Select the CUCM
5

6
Now you finish and login again
7
Make sure to select the servers that would work as AXL and Call Control Service Providers 8
Select the user That would Listen to the recording
9
Choose the Prune policy Configuration
10
Type the Incoming Call rule which is your Destination Address in CUCM 399 and Choose the Action type
11
Most Important is the Archive were you will save your Recording Media12
Now logout and provide your Call Center Supervisor by the link
in our case
https://172.16.245.244:8440/mediasense/login.html

13
Now as you can see a call been recorded between extension 7156 and 306 under Active Call
111.png
Simple and Easy
MediaSense

;D


Standard
Upgrade CUCM

Upgrade CUCM 8.6 to CUCM 9

Drive to 9
everyone write about it
This document provides procedures for performing a direct upgrade to Cisco Unified Communications Manager Release 9.1.2 from Releases 8.6.2
i Have the Update ISO and i save it in My File and start my SFTP
UCSInstall_UCOS_UNRST_9.1.2.12900-11.sgn

0.png
you will follow the same step of Updating the Device Package which i show in earlier post https://ccieroot.com/2016/03/10/update-device-package-in-cucm/

1
Fill the Detail of the SFTP
2
Here i Choose the Upgrade Package
Screenshot 2016-03-10 20.54.59
And Now the Downloading StartScreenshot 2016-03-10 20.55.57
After Downloading it will ask to Install and give an option to Switch Direct to 9 and Reboot or not
Screenshot 2016-03-10 21.29.42.png
Now the Installation Start
Screenshot 2016-03-10 21.30.21.png
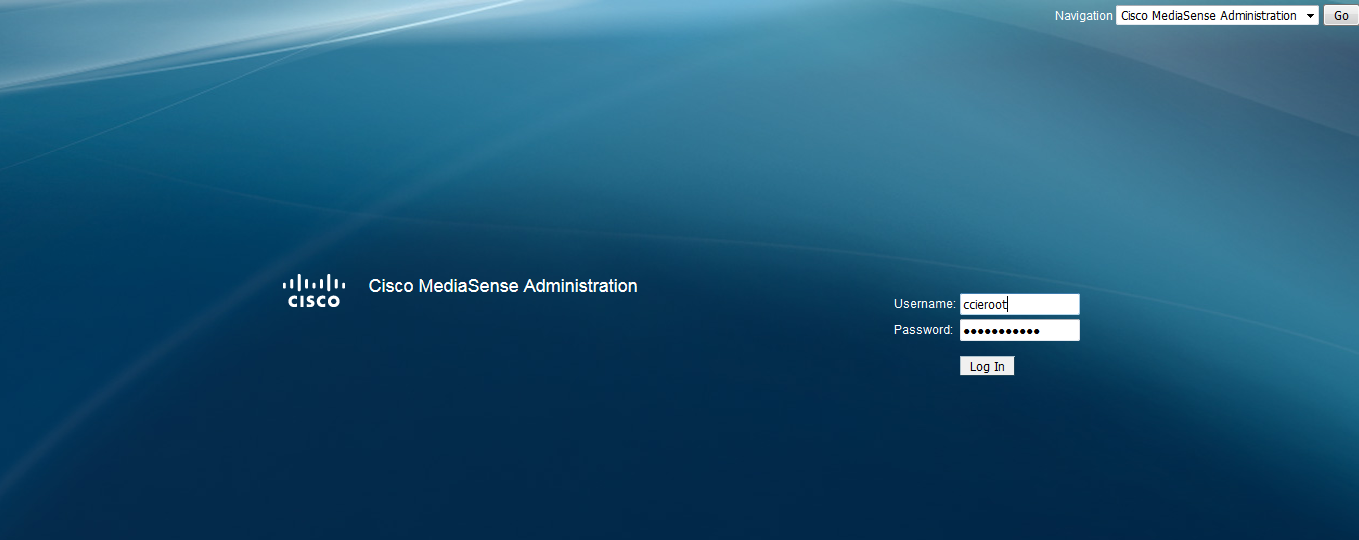
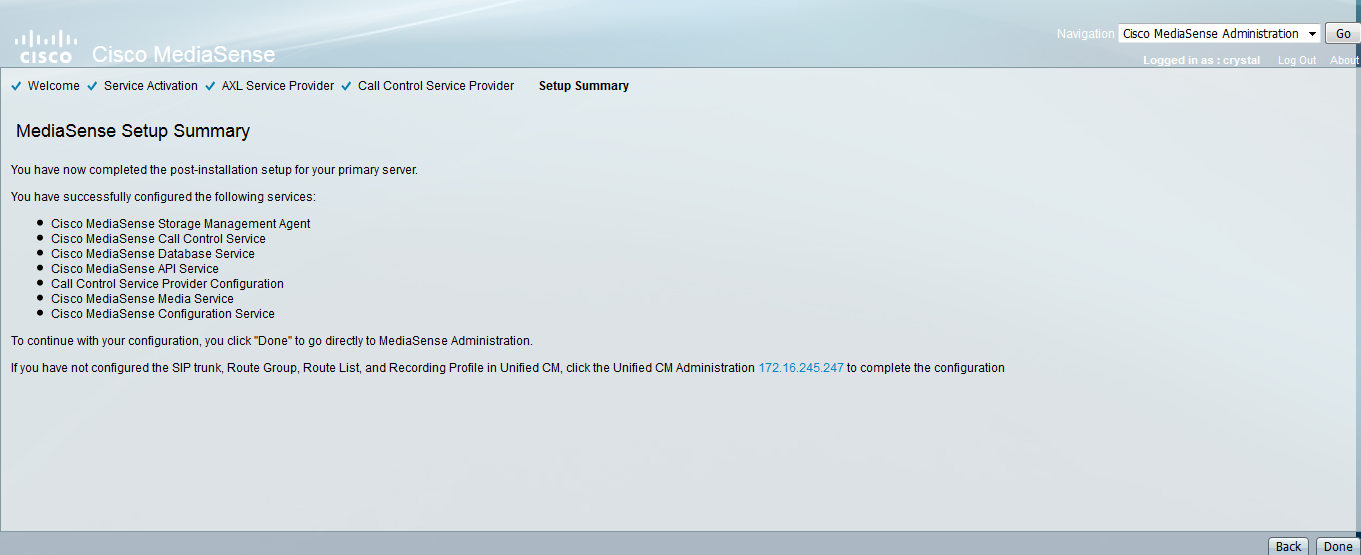
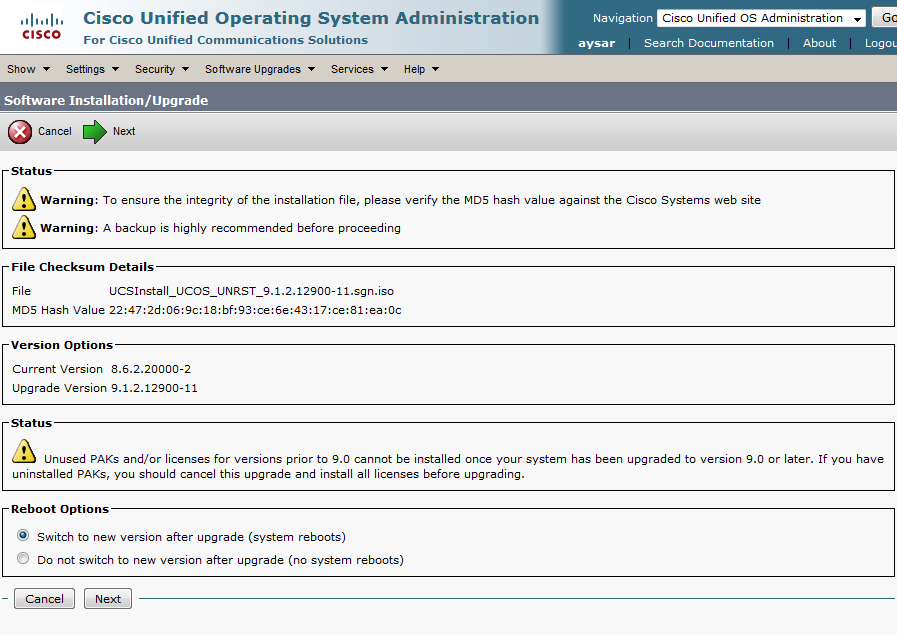
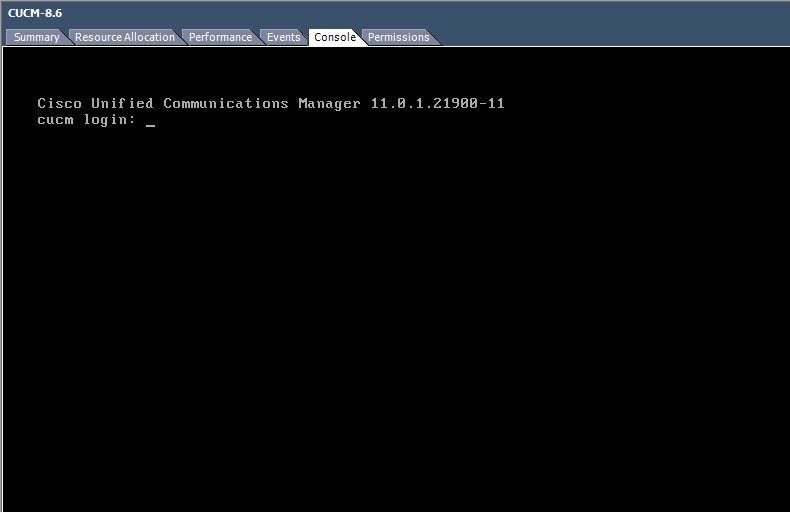
After it finish the system will Reboot and Walla your CUCM Reach the 9  ;DScreenshot 2016-03-10 22.37.06.png

9.1.2.png
9.1.2       ;D

Standard
Device Package

Update Device Package in CUCM

Ever face a Problem with Adding a new Model IP Phone to your Environment such as 8845, 8865 ?
will Luckily Cisco always care about her customer and support them with upgrading their device package always
it’s available in the latest Device Package cmterm-devicepack8.6.2.26169-1.cop.sgn Which can be downloaded from Cisco Software download https://software.cisco.com/download/navigator.html?i=!mmd

I will show you the steps to Upgrade your Device Package
First Turn on your TFTP were you have your Device Package
3
Then Login to your CUCM OS Admin Page
The Choose Software upgrades – Install/Upgrade
1
Then Fill the Detail of the SFTP in CUCM page
2
Press Next and choose the Device Package you want
4
Press Next and the Downloading of the Device package Start5
After the Downloading is done it will ask to Install it
6

7
Now After it Finish you need to Restart the TFTP Service
go to Cisco unified Serviceability – Tools – Control Center  Feature Services and Restart the TFTP Service
in case of a big cluster you  need to add the Device Package to each server and Restart them starting by the Publisher
advice always do this after Duty  ;D

and Finally will find that you can add your new IP Phone Model 8845, 8865
8.png
;D

Standard
CUC

SIP Integratinon Cisco Unity Connection with CUCM

In an Earlier tutorial I explain how to integrate CUC with CUCM using SCCP Protocol
https://ccieroot.com/2015/07/11/sccp-integratinon-cisco-unity-connection-with-cucm/

Let’s move to the SIP

First Create Trunk to CUC
Device – Trunk
Configure the DevicePool, Location Incoming CSS,IP Address, SIP Trunk Security Profile & SIP Profile
1

2

3

4

Note: make sure the SIP Trunk Security Profile has the following settings are selected;

  • Accept Out-of-Dialog REFER
  • Accept unsolicited notification
  • Accept replaces header

Second Create a Route Pattern toward the Voice Mail Number which is 5555 in our case
Call Routing – Route/Hunt – Route Pattern
Choose a partition and the SIP Trunk that you just create

5
Next Step is to configure a Voice Mail Pilot and Voice Mail Profile
6

7

Last step is to configure MWI in service Parameter
System – Service Parameter – Choose the Call Manager Server – Call Manager
and Enable the Service Multiple Tenant MWI Modes
8
Now We Finish the CUCM Part let’s Move to the CUC
First Add the CUCM AXL Server which usable to import the Users from CUCM
13-A

2

Then From Right Corner we chose to add Port Group
here you Decide which protocol you are using weather its SIP or SCCP
in this scenario i choose the SIP
Notice there is no option for Prefix Name like SCCP or MWI Cause SIP use SIP-Notify not MWI Dn

4

5

Then Configure The Ports
7

From Right Side Corner we can check the telephony to make sure no problem exist in the System

8
now time to import the users

The only last thing is to import user from CUCM
go to Users – Import User
Select Import All or By Choose which user you want to have a Voice Mail
all 1

all 2

all 3
Change their Active Schedule to all hour is a better choice and Change their Password
all 4

all 5
and now you can test your Calls to the VM Pilot Number or press the envelop Button

Standard